How to Completely Erase Hard Drive: A Simple, Secure Guide

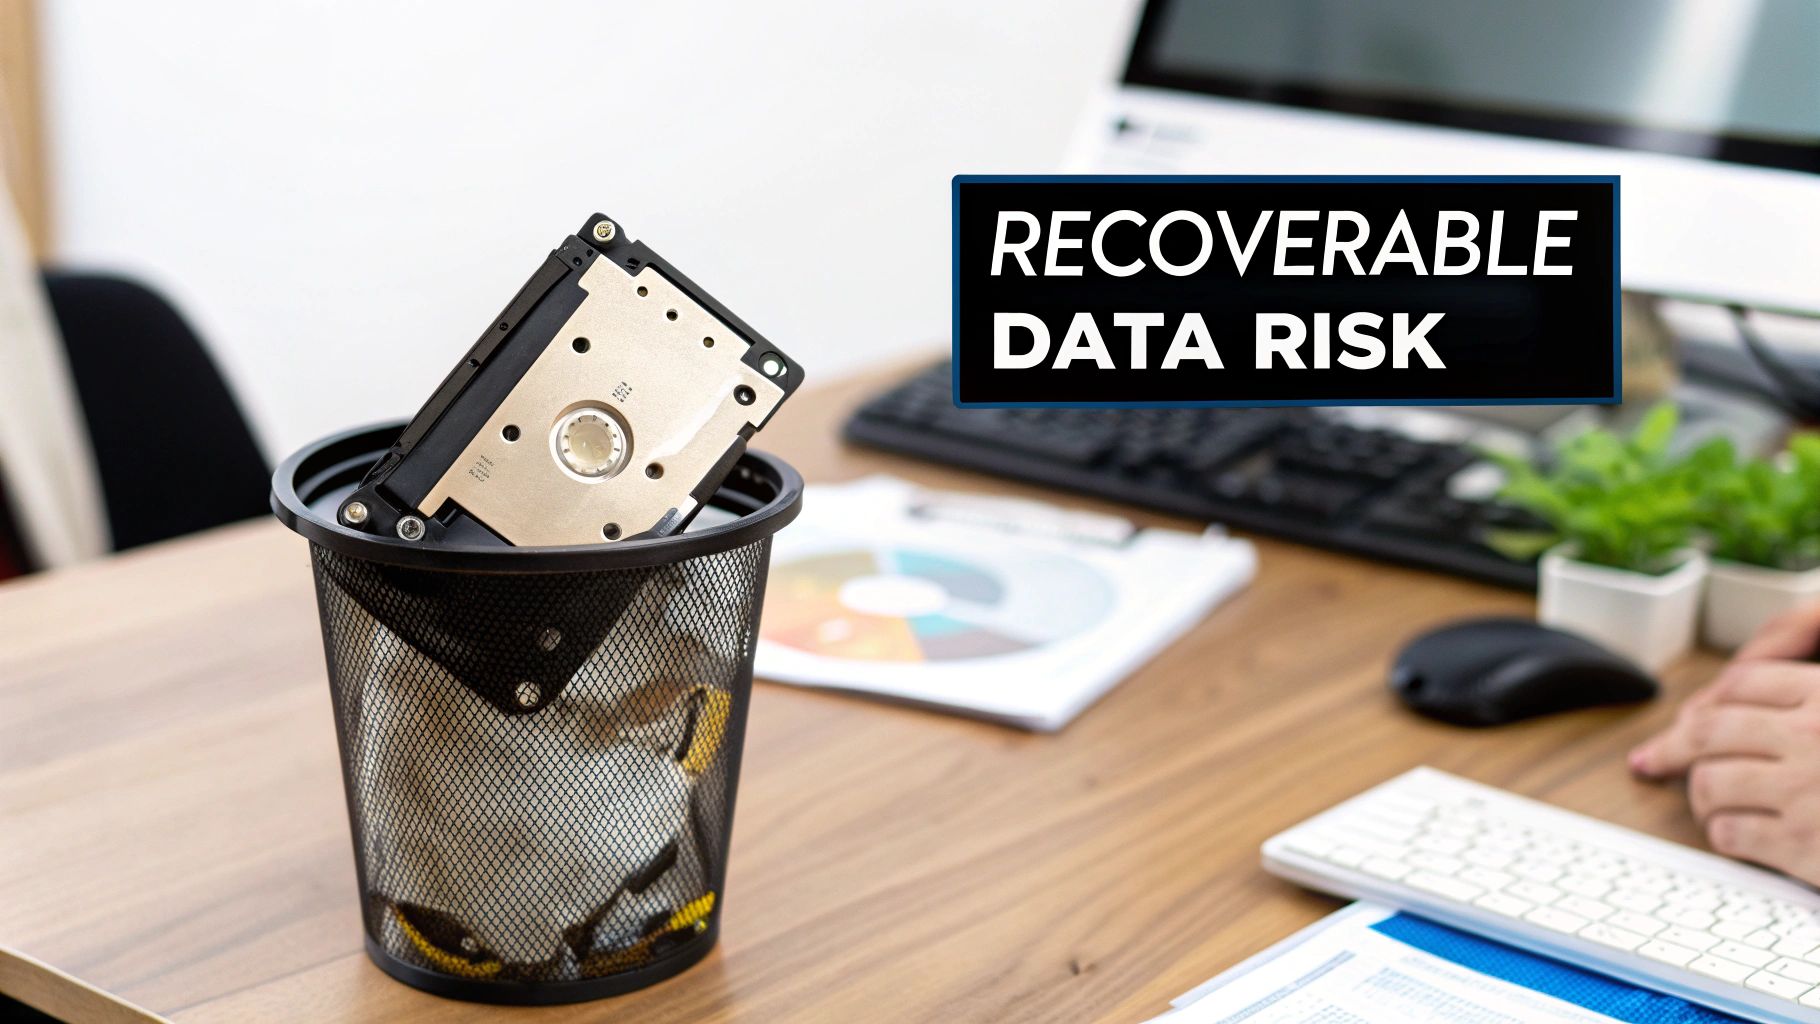
Think dragging your files to the trash bin cleans a hard drive? That's one of the biggest—and most common—security mistakes an organization can make. Simply deleting files or even formatting a drive does next to nothing. All it does is remove the pointers that tell the operating system where to find the data, leaving everything else behind and easily recoverable. This guide provides actionable steps for businesses nationwide, from local Atlanta labs to national data centers, on how to completely erase a hard drive securely.
Why Simply Deleting Files Is Not Enough
When you "delete" a file, you're really just tearing the table of contents out of a book. The chapters are all still there, just a bit harder to find for the average user. But for someone with the right software, it's child's play to piece it all back together.
This isn't just a hypothetical problem. The entire data recovery industry is built on this principle. Just look at the capabilities of modern mobile phone data recovery services—the same techniques that pull photos off a shattered phone can be used to pull sensitive records from a discarded hard drive.
The Hidden Dangers of Recoverable Data
For any business, lab, or hospital, especially those here in the Atlanta area or operating nationwide and handling sensitive information, the consequences of improper data disposal are massive. An old hard drive from a decommissioned server or lab computer can quickly become a compliance nightmare.
Here’s what’s really at stake:
- Compliance Violations: Regulations like HIPAA have strict rules for protecting health information (PHI). A single discarded drive with recoverable patient data is a clear breach, opening you up to massive fines and legal action, no matter where in the U.S. you operate.
- Data Breach Risks: Imagine financial records, employee PII, or proprietary research falling into the wrong hands. All it takes is one improperly wiped drive to cause catastrophic reputational damage.
- Intellectual Property Loss: For universities and research labs across the country, old drives might hold years of priceless data. Failing to erase that information is like leaving your lab notebooks in a public recycling bin.
The bottom line is that formatting only prepares a drive for new data; it doesn't actually destroy the old information. True data erasure means overwriting every single sector of the drive with random, meaningless data, making the original files impossible to reconstruct.
Beyond the Recycle Bin
Even taking a hammer to a drive might not be enough. Without professional tools, it's incredibly difficult to guarantee the magnetic platters or flash memory chips are completely obliterated. This is precisely why certified data destruction methods are non-negotiable for sensitive assets.
This process is about more than just one drive. It’s about creating a secure, auditable system for all your retired IT equipment. If you're dealing with sensitive assets, it's worth understanding the broader best practices for secure data destruction to fully protect your organization.
Choosing the Right Erasure Method for HDDs vs SSDs
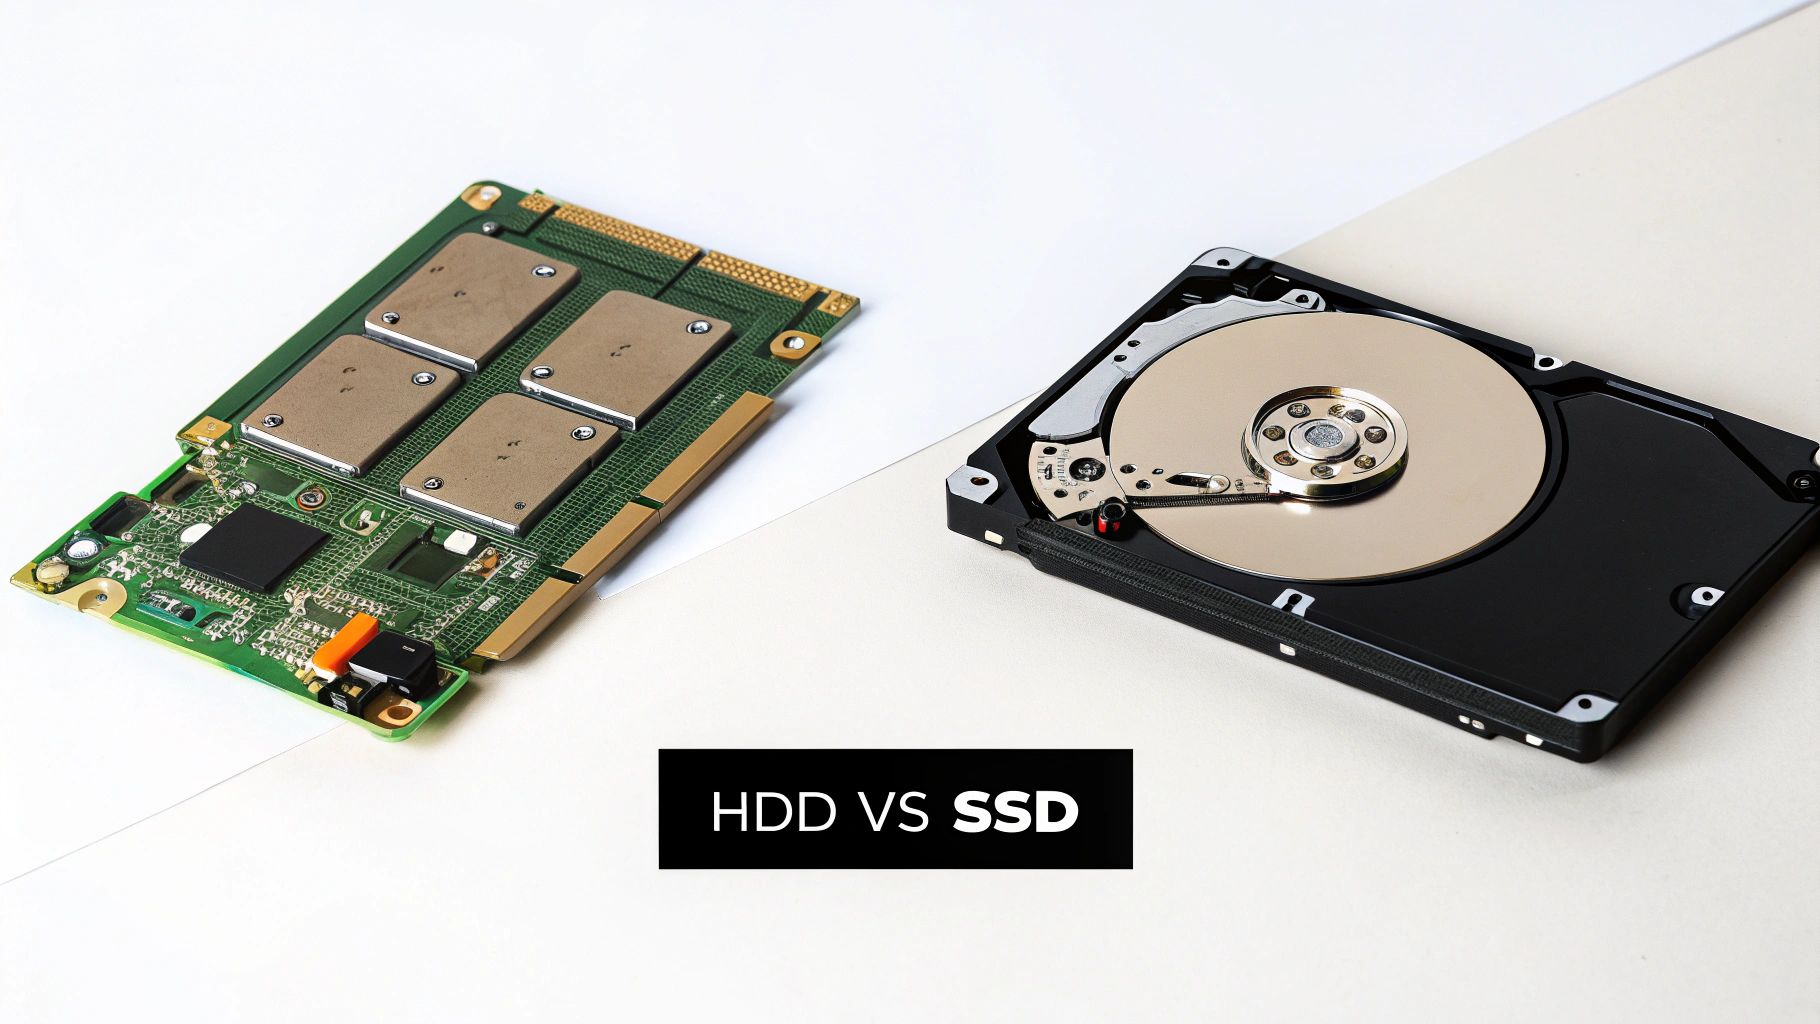
When you’re tasked with completely erasing a drive, the first and most critical question is: what kind of drive is it? The classic spinning platters of a Hard Disk Drive (HDD) and the flash memory chips of a Solid-State Drive (SSD) are fundamentally different technologies. Naturally, the right way to wipe them clean is completely different, too.
Trying to use an HDD erasure technique on an SSD isn't just a waste of time—it can actually damage the drive without even guaranteeing the data is gone. A one-size-fits-all approach is a direct path to compliance headaches and fried hardware. For any IT manager overseeing a university lab or a compliance officer at a hospital anywhere in the nation, getting this right is non-negotiable.
Why Multi-Pass Overwriting Is Still King for HDDs
For years, the undisputed champion of HDD erasure has been multi-pass overwriting. The concept is simple but effective: write patterns of junk data over every single sector of the drive, not just once, but multiple times. It’s the digital equivalent of scribbling over a sentence with a black marker, then going over it again with a red one, and then another, until nothing underneath is remotely readable.
A couple of well-known standards still dictate this process:
- DoD 5220.22-M: This is a classic 3-pass method. It overwrites data with a pattern of zeros, then ones, and finally random characters. It’s a solid, reliable choice that meets compliance requirements for many organizations nationwide.
- Gutmann method: This one is the extreme end of the spectrum, performing a whopping 35 passes. While it was designed to defeat even the most advanced forensic tools, it's total overkill for most situations today and can take days to finish on a large drive.
The need for secure data disposal is only growing. The Hard Disk Eraser Market was valued at USD 0.5 billion in 2024 and is on track to hit USD 1.2 billion by 2034. It’s telling that 37.42% of this revenue is still linked to HDDs. These drives are workhorses in labs across the U.S., often storing archival patient scans or massive research datasets where a single terabyte drive could become a huge compliance risk if mishandled.
The SSD Dilemma: Wear Leveling and Secure Erase
Here’s where things get tricky. If you try to run a multi-pass overwrite on an SSD, you’re making a big mistake. SSDs use a clever technology called wear leveling to spread write operations evenly across all their memory cells, which helps the drive last longer. The drive's controller manages this automatically, meaning you have no direct control over which physical memory block gets written to.
So, when you command an overwrite, the wear-leveling algorithm might just redirect that command to a less-used block, leaving the original data perfectly intact in its old location. You end up pointlessly burning through the drive’s limited write cycles without ever being sure the sensitive data is gone.
For SSDs, the only correct approach is to use the drive’s own built-in firmware commands. These specialized instructions tell the drive's controller to flush all its stored electrons, essentially resetting every memory cell to a pristine, empty state.
The most common command for this is ATA Secure Erase, which is built into the firmware of almost every modern SATA SSD. For the newer, faster NVMe SSDs, the equivalent command is NVMe Format. Both are fast, incredibly effective, and don’t cause any unnecessary wear on the drive.
To make it easier to see the differences, here’s a quick breakdown of the common data erasure methods for both drive types.
Data Erasure Methods HDD vs SSD
| Erasure Method | Best for Drive Type | How It Works | Pros | Cons |
|---|---|---|---|---|
| Multi-Pass Overwriting | HDD (Hard Disk Drive) | Writes random data patterns across every sector multiple times to magnetically obscure the original data. | Highly effective for HDDs; meets established government and industry standards (e.g., DoD 5220.22-M). | Ineffective on SSDs; can be extremely slow on large drives; causes unnecessary wear on all drive types. |
| ATA Secure Erase | SATA SSD | A firmware command that instructs the SSD's controller to apply a voltage spike to all memory blocks, resetting them to a clean state. | The fastest and most reliable method for SATA SSDs; does not cause drive wear; ensures all data is wiped. | Only works on SATA drives; command may be locked by the system BIOS, requiring the drive to be connected to another machine. |
| NVMe Format | NVMe SSD | A firmware-level command specific to NVMe drives that securely wipes all user data blocks, similar to ATA Secure Erase. | The official, standard method for all NVMe SSDs; extremely fast and effective. | Only applicable to NVMe drives; not available for older SATA or HDD hardware. |
Ultimately, choosing the right method is about ensuring data is truly gone for good, not just out of sight. For any organization handling retired IT assets, from hospitals in Atlanta to data centers across the country, mastering these technical details is the key to a secure and compliant disposal process. When it comes time to retire those assets, knowing how to approach secure hard drive recycling completes the lifecycle.
A Practical Walkthrough of Data Wiping Software
If you're going to tackle a secure wipe in-house, you have to treat it as a methodical workflow, not just some quick task you can rush through. We’ll walk through the process using a trusted and widely-used tool, DBAN (Darik’s Boot and Nuke), to show you how to completely erase a hard drive yourself. This approach gives you hands-on control, but it also means the responsibility for getting it right is entirely on your shoulders.
The whole process hinges on creating a bootable USB drive. This turns a small, ordinary flash drive into a powerful data destruction tool. It allows you to start the computer with the wiping software instead of its normal operating system, giving the program full, unrestricted access to the hard drives inside.
Creating Your Bootable Data Wiping Tool
First things first, you need to get your bootable USB ready. This isn't as simple as just dragging and dropping a file. You'll need a specific utility to write the program to the USB in a way that a computer can boot from it.
You'll need two things to get going:
- The DBAN ISO file: This is the disk image of the software itself, which you can download from its official sources. Think of it as the program's blueprint.
- A USB imaging tool: Software like Rufus or balenaEtcher is perfect for this. These programs take the ISO file and correctly install it onto your USB drive, making it bootable.
The process itself is pretty straightforward. You'll open the imaging tool, select the DBAN ISO file you downloaded, choose your target USB drive, and hit start. Heads up: this will erase everything on the USB stick, so double-check that it doesn’t contain any important files. In just a few minutes, you'll have a dedicated data destruction tool ready to go.
Insider Tip: Always use a dedicated, clearly labeled USB drive for this job. The last thing you want during a lab decommission is to accidentally grab the wrong drive or overwrite your bootable tool when you’re in a hurry.
The Most Critical Moment: Identifying the Right Drive
With your bootable USB in hand, it's time for the most crucial—and dangerous—part of the whole process. You’ll need to shut down the target computer, plug in the USB drive, and turn the machine back on. As it starts up, you have to enter the Boot Menu. This is usually done by pressing a key like F12, F10, or ESC right after powering on. The exact key varies by manufacturer, so you might have to look it up.
From the Boot Menu, select your USB drive as the boot device. This will launch the DBAN interface instead of Windows or whatever OS is installed. Once inside DBan, you’ll be presented with a list of all the hard drives connected to the system.
This is where a catastrophic, unfixable mistake can happen.
The software will list drives by their technical identifiers (like sda or sdb) and size. If the computer has multiple drives—say, a main OS drive and a separate data drive—you must be 100% certain which one you are selecting to erase. Erasing the wrong drive is permanent.
To avoid this, follow this simple but non-negotiable rule: physically disconnect all drives you do not intend to wipe. Open the computer case and unplug the SATA or power cables from any drive that needs to be preserved. That way, when you boot into DBAN, only the target drive will even appear on the list, completely eliminating any chance of a disastrous error. For guidance on getting inside the machine, you can learn more about how to safely remove a hard drive from a laptop or desktop.
Setting Expectations for the Wipe
Once you’ve correctly identified and selected the drive, you can choose your wiping method. DBAN offers several options, from a quick erase (one pass of zeros) to the more robust DoD 5220.22-M method (a 3-pass wipe). For any data that falls under compliance regulations like HIPAA, the multi-pass option is the absolute minimum standard.
Now, you just have to wait. And this is where many people are caught off guard by just how long it takes.
- A 1-pass wipe on a 1TB HDD can take several hours.
- A 3-pass wipe on that same 1TB drive can easily take over 24 hours to complete.
- Wiping a large 4TB or 8TB drive can take several days.
The process is incredibly slow because the software has to write new data to every single tiny sector on the drive’s platters. It's a time-consuming but necessary step for true data sanitization. Be realistic about this time commitment, especially if you have a batch of drives to get through. This DIY approach gives you control, but it demands patience and meticulous attention to detail.
Verifying Erasure and Creating a Compliant Audit Trail
A successful data wipe without proof is just a promise, not a defensible action. After you completely erase a hard drive, the next step is absolutely essential: verifying that the job was done right.
This crucial, often-skipped stage is what separates wishful thinking from secure, compliant IT asset disposition. For organizations in regulated fields, from local Atlanta hospitals to nationwide labs, documentation is everything.
Without verification, you're just operating on faith. You need to use specific software tools that can sample sectors of the hard drive to confirm they've been overwritten. These tools read the raw data on the disk, and if they find anything other than the random characters or zeros from your wipe, the process failed. This final check is your only way to know for sure that no original data is left behind.
The process itself is straightforward.
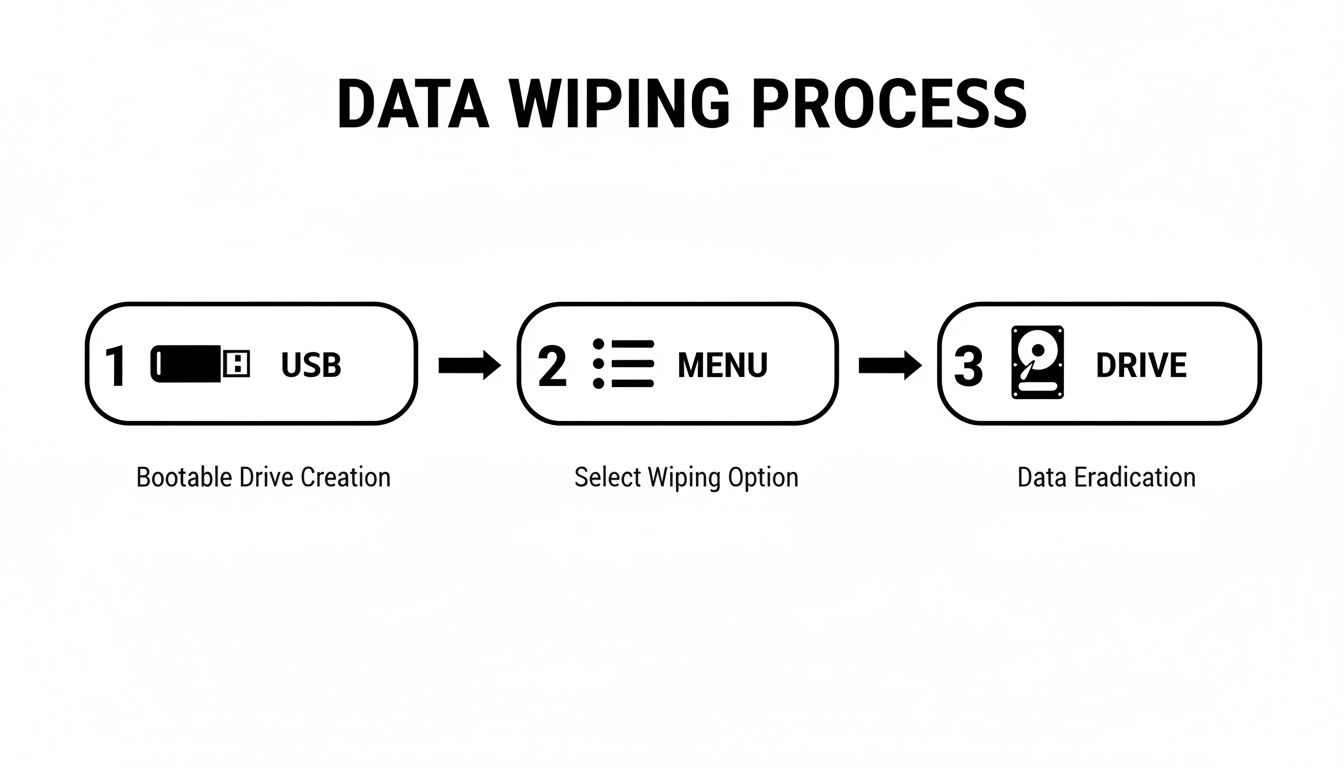
This simple workflow—preparing the bootable media, selecting the correct drive, and executing the wipe—is the foundation of secure in-house erasure.
Building Your Compliant Audit Trail
For any organization bound by compliance standards like HIPAA, Sarbanes-Oxley (SOX), or NIST, proof of destruction isn't optional; it's a core requirement. An audit trail provides irrefutable evidence that you followed a secure process. Think of this documentation as your primary defense if your data handling practices are ever questioned.
The cornerstone of this audit trail is the Certificate of Data Destruction. This formal document serves as the official record of the drive's sanitization, creating a clear chain of custody and accountability.
A proper certificate is far more than just a piece of paper. It should contain specific, detailed information that leaves no room for ambiguity.
- Unique Drive Identifier: The serial number of the hard drive is non-negotiable. This links the certificate directly to a specific piece of physical hardware.
- Erasure Method Used: Did you use the DoD 5220.22-M 3-pass standard? Or ATA Secure Erase? This detail proves you used a method appropriate for the media type.
- Verification Status: The certificate should explicitly state that the erasure was verified and successful.
- Technician and Date: The name or ID of the person who performed the wipe and the exact date and time it was completed are essential for accountability.
A detailed Certificate of Data Destruction is your shield in an audit. It’s the final piece of the puzzle that proves you’ve met your compliance obligations and have a repeatable, secure process for IT asset retirement.
Why Documentation Matters More Than Ever
The stakes for data security have never been higher. The global market for Remote Hard Drive Erasure hit USD 1.73 billion in 2024 and is projected to soar to USD 3.35 billion by 2032. This growth isn't just about technology; it’s driven by ironclad compliance needs, like the HIPAA standards that Atlanta-based medical clinics and healthcare providers nationwide must follow daily.
With cybercrime costs expected to hit $10.5 trillion annually by 2025, sloppy data disposal is a risk no organization can afford to take.
This audit trail of data erasure can also be a component of broader security verification. For many organizations, demonstrating robust data handling is part of a larger compliance picture, often validated by external SOC audit services that review internal controls.
Whether you are a local lab in Georgia or a nationwide data center, creating and maintaining these records is fundamental to modern data governance. You can see what this document entails by reviewing details about a certificate of destruction form and how it supports your security posture.
When to Call a Professional Data Destruction Service
The DIY approach to wiping a hard drive works just fine for small-scale projects. But what happens when the number of drives swells, or the data on them is incredibly sensitive? That's when the process can quickly spiral into a logistical nightmare, loaded with risk.
This is the exact moment IT managers and directors need to pause and ask a critical question: is handling this in-house really worth the time, the cost, and the potential for a catastrophic mistake? Deciding to outsource isn’t just about convenience; it’s a strategic move based on scale, risk, and your available resources. Are you decommissioning a single server in a small office, or are you managing a university lab that’s refreshing an entire fleet of computers? The answer changes everything.
Key Triggers for Outsourcing Data Destruction
Wiping five drives over a weekend is one thing. Tackling five hundred is a completely different beast—it becomes a full-time job that eats up staff hours and opens the door to human error. The tipping point for calling in a pro, whether you're in Atlanta or anywhere else in the U.S., usually comes down to a few clear factors.
Large Volume of Drives: Manually wiping hundreds of drives isn’t just tedious; it's a massive time sink. A professional service uses specialized, high-throughput equipment that can sanitize dozens of drives at the same time, turning a project that could take weeks into a single-day operation.
Strict Compliance Requirements: If your drives hold Protected Health Information (PHI), financial records, or other regulated data, the stakes couldn't be higher. A certified vendor provides a compliant, auditable process from start to finish. They’ll issue official Certificates of Destruction that shield your organization from massive liability.
Lack of Internal Expertise or Staff: Does your team really have the dedicated hours and technical know-how to manage this flawlessly? Pulling skilled IT staff away from their core duties to wipe hard drives is often a poor use of their talent and can lead to costly delays in other critical projects.
A small business retiring one or two office computers can probably get by with an in-house wipe. But a hospital in Atlanta decommissioning a storage array packed with patient data simply can't afford any margin for error. For them, a professional service isn't a luxury—it's an essential part of their risk management strategy.
The decision to outsource really boils down to this: Is the internal cost of managing this project—including staff time, the potential for error, and compliance risk—greater than the cost of hiring a certified expert to do it right?
The Growing Need for Professional Services
The demand for secure data erasure is surging, and it's no surprise. It’s driven by the massive volume of IT assets being retired every single day. The data erasure market is projected to grow from USD 3.15 billion in 2025 to USD 5.59 billion by 2030.
This growth is fueled by an estimated 2.8 billion enterprise storage units being refreshed every 18-24 months. For industries like healthcare, where data breaches from lost or improperly disposed of media are rampant, this just highlights why relying on professional, verifiable destruction is non-negotiable.
Scenarios Where Professionals are the Smart Choice
Let's walk through a couple of real-world examples to see the difference between DIY and professional services.
Scenario A: The Small Business Server
A local marketing agency in any U.S. city is retiring an old server with three hard drives. They contain client project files and internal business financials. An IT consultant can likely handle this in-house over an afternoon using a tool like DBAN, generate some simple documentation, and call it a day. The scale is small, the data is sensitive but not under strict regulations like HIPAA, and the resource drain is minimal.
Scenario B: The University Lab Refresh
Now, picture a large university upgrading a computer lab with 150 workstations, each with its own SSD. The old drives are filled with years of student data and research projects.
Suddenly, the DIY approach completely falls apart:
- Time: Wiping 150 drives, even fast SSDs, would monopolize an IT staffer’s time for days, if not weeks.
- Logistics: The team would have to track each drive by serial number, manage the wiping process, verify every single one, and then generate individual documentation.
- Risk: With that many drives changing hands, the chance of one being misplaced, improperly wiped, or poorly documented skyrockets.
In this case, a professional service is the obvious choice. They can bring a team on-site, securely transport the drives to a certified facility, perform the erasure with industrial-grade equipment, and provide a single, consolidated Certificate of Destruction covering all 150 assets. It's not only faster and more secure but often proves more cost-effective when you factor in the true cost of your internal staff's time.
For organizations managing large-scale IT asset disposition—from local Atlanta-area hospitals to nationwide data centers—a professional computer disposal service streamlines the entire process, delivering security, compliance, and peace of mind.
Common Questions About Erasing Hard Drives
Even with a solid plan, a few key questions always come up when it's time to completely erase a hard drive. Getting these details right can be the difference between a compliant, secure wipe and a major data security headache. Let's walk through some of the most common things people ask.
What Is the Real Difference Between a 1-Pass and 3-Pass Wipe?
A 1-pass wipe is pretty much what it sounds like: the software goes through every single sector of your hard drive once, overwriting it with a pattern, usually all zeros. It’s quick and effective for getting rid of non-sensitive data. For most day-to-day purposes, this makes the original information incredibly difficult for anyone to get back using standard software. Think of it as a solid baseline for basic data sanitization.
A 3-pass wipe, on the other hand, is a whole different level of thorough. Standards like the well-known DoD 5220.22-M don't just write over the data once; they do it three separate times with different patterns. First with zeros, then with ones, and finally with a random character. This layering approach makes data recovery practically impossible, even for forensic experts with advanced tools. If you're handling sensitive information like HIPAA-protected health records, this is often the bare minimum for compliance anywhere in the United States.
Can Data Be Recovered After Physical Hard Drive Shredding?
Absolutely not. Once a drive has been professionally shredded, the data is gone for good. Physical destruction is the final, irreversible step in data erasure. The process doesn't just break the drive—it completely annihilates it.
Industrial shredders are incredibly powerful, using heavy-duty blades to grind a drive's magnetic platters (on HDDs) or its flash memory chips (on SSDs) into tiny metal fragments, like confetti. Once the physical media that held the data is turned into dust, there is simply nothing left to recover.
This method is irreversible and provides 100% certainty that the data is gone forever. It's the go-to solution for failed or end-of-life drives, or for media that once held exceptionally critical information where no risk is acceptable.
Does a Factory Reset Truly Erase My Hard Drive?
Here's a critical point: a factory reset is not a secure way to erase data. You should never, ever mistake it for one. This feature is only meant to return a device's software to its original, out-of-the-box state, not to securely sanitize the hard drive itself.
When you hit "factory reset," the device usually just reinstalls the operating system and removes the file system's pointers that tell it where your old files are. But the actual data—your documents, photos, and records—is often still sitting right there on the drive's sectors.
Anyone with specialized data recovery software can easily scan that drive and piece those "deleted" files back together. For any kind of professional IT asset disposal, relying on a factory reset leaves a massive security vulnerability wide open. To truly erase a hard drive, you have to use a proper data wiping utility to overwrite the data or go for physical destruction.
When your Atlanta-area lab, clinic, or data center needs guaranteed data destruction and compliant equipment disposal, guesswork isn't an option. We provide certified services nationwide to ensure your sensitive data is handled securely and your assets are recycled responsibly. Scientific Equipment Disposal provides certified, on-site services to ensure your sensitive data is handled securely and your assets are recycled responsibly. Learn more about our secure e-waste and lab equipment solutions at https://www.scientificequipmentdisposal.com.