How to Securely Remove a Hard Drive From a Laptop

Knowing how to remove a hard drive from a laptop seems like a simple physical task—and on one level, it is. You're usually just dealing with a few screws. The basic motions involve powering down, unplugging everything, opening the case, and carefully lifting the drive out.
But that's just the start. That simple action is your first step toward secure data management and compliant IT asset retirement, a critical process for organizations nationwide.
Why Planning Your Hard Drive Removal Matters
Before you even reach for a screwdriver, a successful hard drive removal starts with a clear plan. For an IT manager handling a fleet of devices in a corporate office in Atlanta or a lab tech decommissioning old equipment anywhere in the US, just yanking the drive is a tiny part of a much bigger picture.
The real job is protecting sensitive data, staying compliant with regulations, and making sure the asset's lifecycle is managed correctly from start to finish. If you just jump in without a strategy, you're inviting data breaches, compliance violations, and even damaged hardware.
This is especially true in regulated fields like healthcare or scientific research. A single laptop could be holding protected health information (PHI) or years of proprietary research. Mess up the hard drive handling, and you could be looking at massive fines and a serious blow to your organization's reputation. A 2023 report found the average cost of a healthcare data breach hit $10.93 million, which shows you just how high the stakes are for businesses across the country.
Verify Your Backups First
This is the absolute point of no return. Before you physically touch that drive, you have to be 100% certain all critical data has been securely backed up somewhere else. Once you pull that drive, you have to assume the data on it will either be inaccessible or completely destroyed.
Imagine a university lab refreshing 50 laptops. Each one could hold irreplaceable research data or student records. If the IT team rushes the job without confirming backups, they could wipe out years of institutional knowledge in an afternoon. It's on the IT department to get confirmation from users or department heads that everything important is safe and sound.
Pro Tip: Create a formal sign-off sheet. Have the asset owner or department head sign a document confirming that all data is backed up and the drive is cleared for removal and destruction. This creates a bulletproof paper trail and clarifies accountability.
Identify the Drive Type You Are Handling
Not all laptop drives are created equal. Popping open a laptop without knowing what's inside is like trying to fix an engine without knowing if it's a gas or diesel model. Modern laptops use a few different kinds of drives, and each one comes out a little differently.

Here are the usual suspects you'll run into:
- 2.5" SATA Drives: These are the classic, rectangular hard drives (HDDs) or solid-state drives (SSDs) you'll find in older or more budget-friendly laptops. They're about the size of a deck of cards and are usually secured in a metal caddy.
- mSATA SSDs: These are much smaller, looking like a bare circuit board. They plug directly into a special slot on the motherboard and are shorter and wider than a stick of RAM.
- M.2 SATA/NVMe SSDs: This is the current standard, especially in thin and light laptops. These "gumstick" drives are long, thin cards screwed right onto the motherboard.
Do yourself a favor and identify the drive type before you open the case. Just look up the laptop's model number and check the specs online. This little bit of prep work tells you whether you're looking for a big caddy or one tiny screw, which is a lifesaver when you're processing dozens of machines.
Once the drive is physically out, you need to decide its fate. To learn more about what comes next, check out our guide on secure hard disk disposal to make sure you handle it correctly.
Preparing the Laptop for Safe Hardware Access
Before you even think about reaching for a screwdriver, you need to prep your workspace and the laptop itself. Taking a few minutes to run through this pre-flight checklist isn't just a good idea—it's non-negotiable. This is how you protect yourself, the laptop’s surprisingly delicate guts, and the data you’re trying to retrieve or destroy. Skipping these steps is a fast track to fried components or, worse, personal injury.
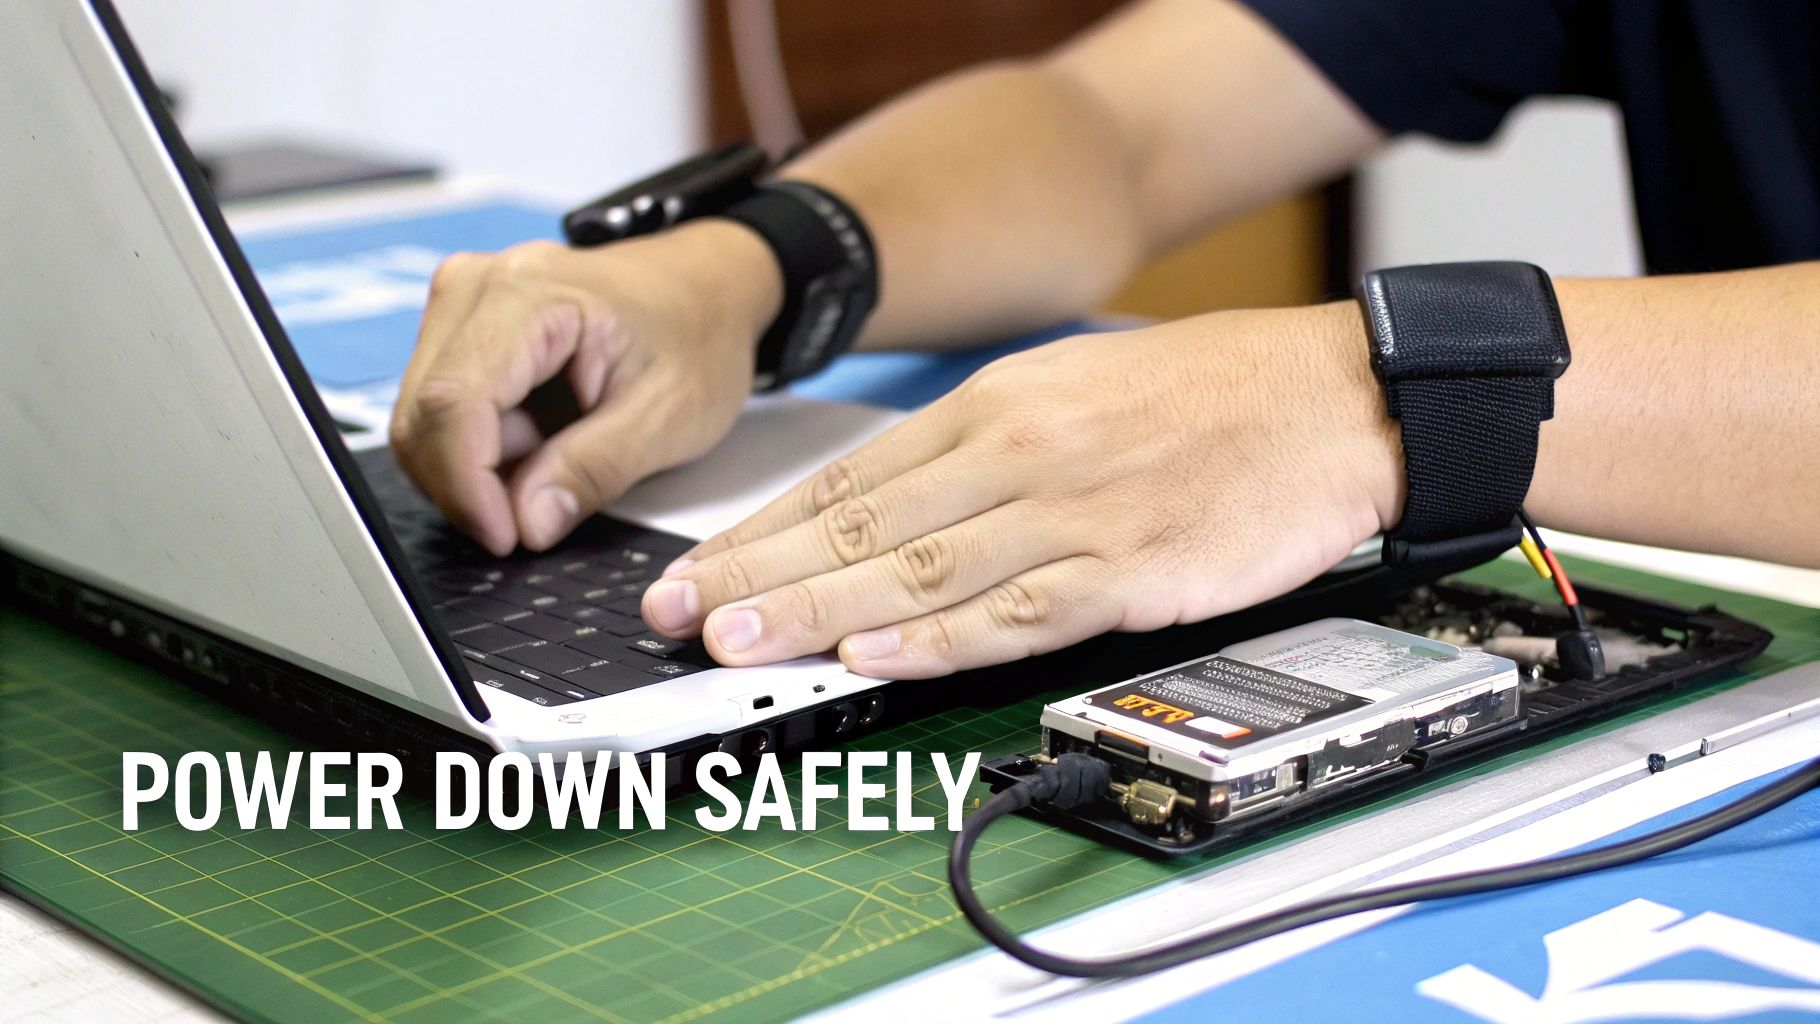
First things first, shut the laptop down completely through the operating system. Don’t just close the lid or put it to sleep. Once it’s fully off, unplug the power cord and disconnect everything else—USB drives, monitors, network cables, the works. Every single connection is a potential path for stray electrical current.
Power Down Completely by Disconnecting the Battery
A simple shutdown isn’t enough. The battery is a live power source just waiting to cause problems, so it has to be neutralized. How you do this depends entirely on the laptop's design.
Older, beefier laptops usually have an external battery you can pop right out. Flip the machine over, and you'll likely see one or two sliding latches. Just slide those, and the battery pack will release. Set it aside somewhere safe. This is by far the easiest scenario.
Modern ultrabooks and other slim laptops are a different story. Their batteries are internal, which means you have to open the bottom case before you can get to it. Once you're inside, you'll see a bundle of wires running from the battery to a connector on the motherboard. Gently unplug this connector from its socket. Never pull on the wires themselves; always grip the plastic connector. This is the most critical step to ensure the machine is truly dead while you work.
By the way, once you have the drive out, you'll need a plan for the data. You can learn more about how to wipe a hard drive to make sure your information is gone for good.
Prevent Electrostatic Discharge Damage
Electrostatic Discharge (ESD) is the silent killer of computer components. That little zap you sometimes feel when you touch a doorknob can carry thousands of volts—more than enough to instantly fry a motherboard or SSD. In fact, ESD damage is a leading cause of premature hardware failure, but it’s completely preventable.
Think about this: Your body needs to feel a shock of around 3,000 volts. A sensitive computer component can be permanently damaged by as little as 30 volts.
To create a static-free workspace, you need to follow a few simple rules:
- Use an Anti-Static Wrist Strap: This is your best friend. Get the strap snug on your wrist and clip the other end to a large, unpainted metal part of the laptop's frame or another grounded object. This keeps the electrical charge between you and the device perfectly balanced.
- Work on the Right Surface: Get off the carpet. Working on carpet, blankets, or even some clothing is asking for trouble. An anti-static mat is the professional's choice, but a clean wooden or laminate table works just fine in a pinch.
- Ground Yourself First: Even before you strap in, make it a habit to touch a large metal object (like a desk leg) to discharge any static you've built up just by walking around.
By being meticulous here, you eliminate the biggest risks involved in opening up a laptop. This discipline makes sure the process is safe, successful, and doesn't leave you with a very expensive paperweight.
Alright, time to roll up our sleeves and get to the hands-on part. Laptops have come a long way, and the methods for getting to their hard drives have changed right along with them. We're going to walk through the three most common situations you'll run into, from older models with handy access panels to modern ultrabooks that demand a bit more patience.
The whole point here is to get you comfortable enough to remove a hard drive from a laptop, no matter how old or new it is. Getting this down is a core skill for any IT pro, especially when you're dealing with big hardware refreshes or data security projects.
Scenario 1: The Dedicated Hard Drive Access Panel
On a lot of older or business-class laptops, the manufacturers actually made our lives pretty easy. They included a dedicated access panel—a small cover on the bottom of the machine that gives you a direct line to the hard drive bay without having to take the whole thing apart.
Flip the laptop over. If you see a small, rectangular panel held in by one or two screws, you've hit the jackpot. This is the simplest removal you'll ever do.
- Find and Remove the Screws: Just unscrew the one or two screws holding that panel down. Most of the time they're Phillips-head, but a small flathead might do the trick in a pinch.
- Slide or Lift the Panel: Some panels are designed to slide off, while others just lift straight up. Give it a gentle nudge to see which way it wants to go.
- Expose the Drive: With the panel gone, you'll see the hard drive, which is almost always a 2.5-inch model sitting in a metal caddy.
This user-friendly design was a staple in laptops from the early 2010s. The whole process takes just a couple of minutes.
Scenario 2: Removing the Entire Bottom Case
Most modern laptops, especially the super-thin ultrabooks, have moved away from easy-access panels in favor of a sleek, unibody design. To get at the guts of the machine, you have to take off the entire bottom case. It might sound like a big deal, but it's standard practice these days.
First, you'll need to locate every single screw on the bottom of the laptop. Be warned: you'll often find a mix of screw lengths and types, so keeping them organized is absolutely critical.
Pro Tip: A magnetic screw mat or even a simple ice cube tray is a lifesaver. As you remove each screw, place it in a spot on the mat that mirrors its location on the laptop case. This little bit of organization keeps you from putting a long screw into a short hole during reassembly—a mistake that can easily punch right through the motherboard.
Once the screws are out, grab a plastic pry tool or a spudger to separate the bottom case from the main body. Whatever you do, don't use a metal screwdriver for this. You'll scratch, gouge, and permanently damage the plastic or aluminum casing.
Find a seam and gently work your tool along the edge, listening for the soft popping sounds of the plastic clips disengaging. Go slow and be patient to avoid snapping any of them off.
Locating and Disconnecting Different Drive Types
With the laptop open, the next step is to play "spot the drive." Depending on the age and model, you could be looking for a chunky, caddy-mounted drive or a tiny SSD that looks like a stick of gum.
Caddy-Mounted 2.5-Inch SATA Drives
These are the big, obvious ones. They're rectangular, about the size of a deck of cards, and are typically secured in a metal or plastic frame called a caddy.
- Disconnect the Connector: First, carefully unplug the flat, wide SATA connector linking the drive to the motherboard. It should pull straight out without much force.
- Unscrew the Caddy: The caddy itself is usually held down with a few small screws. Remove them.
- Lift the Drive Out: With the screws gone, you can lift the entire drive and caddy assembly right out of the laptop.
Knowing a bit about the technology inside the machine can be helpful. For example, understanding the differences between drive interfaces after seeing a comparison of SATA vs SAS hard drives can give you a better sense of how these components work.
M.2 SATA and NVMe SSDs
In most new laptops, you won't see a bulky caddy at all. Instead, you'll be looking for a small, thin circuit board screwed directly onto the motherboard. That's your M.2 drive.
- Locate the Retention Screw: The M.2 drive is held in place by a single, tiny screw at the end opposite the connector pins.
- Remove the Screw: Grab a small Phillips-head screwdriver and carefully take that screw out.
- The Drive Will Pop Up: As soon as the screw is removed, the M.2 drive will pop up to about a 30-degree angle. This is completely normal and by design.
- Slide It Out: Now, just gently pull the drive out of its socket at that same angle.
It's a delicate process simply because the parts are so small, but it's very straightforward. By getting familiar with these three main scenarios—the access panel, the full bottom case, and the different drive types—you'll be ready to tackle just about any laptop that lands on your workbench.
What To Do With the Drive After Removal
Okay, so you’ve successfully pulled the hard drive out of the laptop. The physical work might be done, but the most critical part of the job has just begun. Just tossing that drive into a box on a shelf is a data breach waiting to happen. What you do next will determine whether you're protecting sensitive information or creating a massive liability for your organization.
This next phase is all about control. For any institution—from a hospital in Atlanta to a research university on the West Coast—maintaining a secure chain of custody isn't just a good idea; it's a core compliance requirement. This means documenting every single step, from the moment the drive leaves the laptop until its data is verifiably gone forever.
This diagram shows the basic physical steps, each one a link in that crucial chain of custody.

Data Wiping for Drives You Plan to Reuse
If a hard drive is still perfectly functional and you plan to put it back into service or resell it, the data has to be completely and irreversibly erased. Simply dragging files to the trash bin does next to nothing; that data is incredibly easy to recover. Proper data sanitization requires specialized software to overwrite the entire drive with random characters, making the original data impossible to get back.
A battle-tested and highly effective method is the DoD 5220.22-M 3-pass wipe. It’s a standard trusted by government and security pros for decades for a reason. Here’s how it works:
- Pass 1: Writes a binary zero across every sector of the drive.
- Pass 2: Writes a binary one across every sector.
- Pass 3: Writes a random character and then verifies the write was successful.
This is the perfect approach for an IT department refreshing employee laptops. It ensures the next user gets a completely clean slate, with zero chance of accessing any lingering data from the previous owner.
Physical Destruction for End-of-Life Drives
Not every drive gets a second life. For drives that are old, damaged, or held extremely sensitive information (think patient data or proprietary research), physical destruction is the only guaranteed way to go. It completely eliminates any possibility of data recovery.
You have two main options here:
- Degaussing: This involves hitting a traditional HDD with a monster magnet that scrambles the magnetic platters, rendering the data unreadable. Just remember, this is completely ineffective on SSDs, which use flash memory chips.
- Shredding: This is the undisputed gold standard for data destruction. An industrial shredder grinds the drive—platters, chips, and circuit boards—into tiny, useless fragments. It is the most secure method for both HDDs and SSDs. We have a complete https://www.scientificequipmentdisposal.com/the-ultimate-guide-to-hard-drive-shredding/ that goes into much more detail.
For the highest level of security, especially with sensitive data, you should already be encrypting data and backups to stay compliant with regulations like HIPAA.
Key Takeaway: If you hire a certified vendor for physical destruction, you must get a Certificate of Destruction. This is a legal document that serves as your proof for any compliance audits, showing you followed proper procedures and absolving your organization of liability.
Staying Compliant and Proving It
Regulations like HIPAA in healthcare or CCPA in California have very strict rules about how personal data is handled and destroyed. The simple act of removing a hard drive from a laptop kicks those obligations into high gear. If you don't securely manage that drive from start to finish, you could be facing severe fines and serious damage to your reputation.
There's a reason the global market for hard drive destruction services is booming—it's expected to jump from USD 1.65 billion to USD 5.05 billion by 2035. The stakes are just that high.
A thoroughly documented chain of custody, capped off with a Certificate of Destruction, creates the audit trail you need to prove you’ve met your legal responsibilities. It’s not just paperwork; it’s your shield.
Choosing a Partner for Compliant E-Waste Disposal
Once you’ve successfully pulled a hard drive from a laptop, the real work begins—especially for a business, hospital, or university. What do you do with that drive, and the dozens or hundreds just like it? Trying to manage this in-house is a massive logistical headache and an even bigger compliance risk. This is exactly why partnering with a certified e-waste expert is a strategic move for businesses locally in Georgia and across the nation.
A professional IT asset disposition (ITAD) partner takes a complex, high-risk task and turns it into a secure, fully documented process. They handle every single link in the chain of custody, from scheduling on-site pickups to secure transport and final disposition, shielding you from liability every step of the way. For any organization that can't afford a single slip-up with sensitive data, this kind of nationwide service is non-negotiable.
The Value of Professional ITAD Services
When you bring in a specialist, you're not just getting rid of old equipment. You're buying peace of mind and a guarantee of compliance. A reputable partner provides a structured process that covers all the bases for asset retirement.
Key services that make your life easier include:
- Secure Logistics: Professional teams arrive at your facility to pack and transport removed hard drives and other e-waste. They use secure, GPS-tracked vehicles, ensuring nothing goes missing between your site and theirs.
- Certified Data Destruction: They offer documented data wiping using standards like the DoD 3-pass method for drives that can be reused. For everything else, they provide physical shredding and give you a Certificate of Destruction for your records.
- Responsible Recycling: It's not just about the hard drives. A good partner ensures all electronic components are recycled in an environmentally compliant way, keeping hazardous materials out of landfills.
This end-to-end management is absolutely critical for places like healthcare providers in the Atlanta metro area and research labs nationwide, where the data on a single drive could fall under strict regulations like HIPAA.
By outsourcing this process, your organization effectively transfers the risk of a data breach or environmental violation to a certified expert whose entire business is built around handling it correctly. It's a fundamental step in modern risk management.
Navigating a Nationwide E-Waste Challenge
The need for professional hard drive disposal is only getting bigger. The global hard disk drive market was valued at USD 49,681.5 million in 2025 and is projected to nearly double by 2034. Here in the USA, while big drives over 1TB still dominate, a significant 31% of new laptops are now sold with only SSDs. This is flooding the market with legacy HDDs that all need secure disposal. You can review the hard disk drive market projections here for more on these trends.
This flood of outdated drives creates a massive disposal problem. A certified partner can handle this volume efficiently, whether you're a local business in Georgia or a national corporation with sites all over the country. They have the scale and expertise to process thousands of drives while maintaining a perfect audit trail for every single one.
How to Select the Right Disposal Partner
Choosing the right partner is everything. Not all e-waste companies offer the same level of security, compliance, or professionalism. When you’re vetting a potential vendor, you need to ask the right questions to make sure they can meet your specific needs.
Here are the essential criteria to look for:
- Look for Certifications: The first question should always be about certifications. Are they certified to standards like R2 (Responsible Recycling) or e-Stewards? These aren't just fancy logos; they prove the vendor adheres to the highest industry standards for both data security and environmental protection.
- Verify Their Data Destruction Process: Dig into the details. Do they offer both on-site and off-site shredding? Can they provide detailed, serialized Certificates of Destruction that will stand up in an audit?
- Inquire About Logistics and Security: How do they actually move your assets? Are their vehicles secure? Do their employees undergo background checks? You need to trust the people handling your data.
- Confirm Their Geographic Reach: Make sure they can service all of your locations. A partner with a strong regional presence in the Southeast and the ability to coordinate nationwide service offers the most flexibility.
By selecting a qualified partner, you turn the complex job of managing old hard drives into a streamlined, secure, and sustainable part of your IT lifecycle. Choosing a certified electronic waste recycling company is the best way to ensure your organization stays protected and compliant.
Even after you’ve got the process down, a few questions always seem to pop up right before you crack open a laptop. It’s completely normal. Whether this is your first time pulling a drive or you’re in the middle of a massive hardware refresh, let’s clear up a few common sticking points.
This is especially true when you're dealing with a mix of manufacturers. The basic idea is the same, but the way a Dell is put together can be worlds different from a Lenovo or an HP, especially when it comes to tiny screws and hidden plastic clips.
Do I Need to Worry About My Laptop's Warranty?
Yes, this is definitely something to keep in mind. Popping open the case on a laptop will almost certainly void the manufacturer's warranty. Most companies seal their devices and consider any unauthorized entry a breach of their terms.
But let's be practical here. If the laptop is already past its warranty period, then it’s a non-issue. For devices that are still under warranty but are being decommissioned anyway, your priority has shifted. Secure data destruction now trumps preserving the warranty, making it a secondary concern at best.
Expert Insight: Always check the warranty status before you start. For a large fleet of company laptops, your asset management system should have this data. If not, a quick search on the manufacturer's support site with the serial number is the fastest way to know exactly where you stand.
Can I Put the Removed Hard Drive in an External Enclosure?
Absolutely! This is one of the best things you can do with a perfectly good 2.5-inch SATA hard drive or SSD. Sliding it into an external USB enclosure is a great, low-cost way to access the data or simply repurpose it as a portable drive for backups or extra storage.
The process is super simple. You buy an inexpensive enclosure online or from a local shop, pop the drive in, and tighten a couple of screws. It then plugs into any computer via USB, and you can browse the files just like any other external drive. It's the perfect step to take before you commit to wiping it for good.
Wiping vs. Shredding: Which Is Better?
This is a classic question, and the answer is: it depends entirely on what you plan to do with the drive next. Neither method is universally "better" than the other—they just serve different purposes.
- Choose Wiping If: You want to reuse, sell, or donate the drive. A proper software wipe, like a DoD 3-pass method, completely erases all the data while leaving you with a functional, clean drive that's ready for its next life.
- Choose Shredding If: The drive is old, dead, or held extremely sensitive information (like financial records, PHI, or proprietary research). Physical destruction is the only way to be 100% certain that data can never be recovered, no matter what.
The push for secure data disposal is only getting stronger. The global market for Hard Disk Destruction Equipment was valued at USD 1,760 million in 2024 and is expected to hit USD 2,559 million by 2032. This isn't just a trend; it shows how critical secure data sanitization has become, especially for data-heavy industries.
Both wiping and shredding lead to a secure outcome. However, for any kind of audit trail or compliance requirement, physical destruction provides undeniable proof. After a professional shredding service, you should always get documentation. You can learn more about the importance of a Certificate of Destruction form and why it’s essential for your records.
When your organization needs a trusted partner for compliant IT and lab equipment disposal in the Atlanta area or nationwide, turn to Scientific Equipment Disposal. We provide secure, on-site data destruction, certified recycling, and a fully documented chain of custody to protect your assets and ensure compliance. Get in touch with us at https://www.scientificequipmentdisposal.com to schedule a pickup.