How to Completely Clean a Hard Drive for Secure Disposal

Dragging files to the Trash folder feels final, but it's a dangerous illusion. To completely clean a hard drive, you have to go much further. You either need specialized software to overwrite every last bit of data or, in some cases, you have to physically destroy the drive itself. A standard deletion just removes the file's pointer, leaving the actual information sitting there, ripe for the picking.
Why Deleting Files Fails to Secure Your Data
When you move a file to the recycling bin and empty it, you’re not actually erasing anything. All you're doing is telling the operating system that the space the file occupied is now available for new data. Until something new is written over it, that original information—whether it’s a client list, patient records, or proprietary research—remains perfectly intact on the disk.
This creates a massive security blind spot. With readily available software, almost anyone can restore these "deleted" files. To really see how this works, it’s helpful to understand how to recover deleted files from a computer even after they seem to be long gone. This gap between perceived and actual security is where devastating data breaches are born.
The Real Cost of Improper Disposal
The consequences of leaving recoverable data on old hardware are severe, and the numbers are jaw-dropping. The average global cost of a data breach recently hit USD 4.88 million, and for financial firms, that number skyrockets to an average of USD 6.08 million. This massive risk is what’s fueling the explosive growth of the Hard Drive Destruction Service market, which is projected to reach USD 5.05 billion by 2035.
For any organization handling sensitive information, the stakes are even higher. Think about what's at risk:
- Healthcare Facilities: Patient health information (PHI) protected under strict HIPAA regulations.
- Universities and Labs: Irreplaceable research data, intellectual property, and student records.
- Corporate Offices: Financial statements, employee PII, and critical trade secrets.
A single improperly discarded hard drive can trigger devastating financial penalties, permanent reputational damage, and serious legal liability. True data sanitization isn't just an IT task; it's a fundamental part of risk management for businesses nationwide.
Moving Beyond Simple Deletion
To truly clean a hard drive, you have two proven paths: software-based wiping or physical destruction.
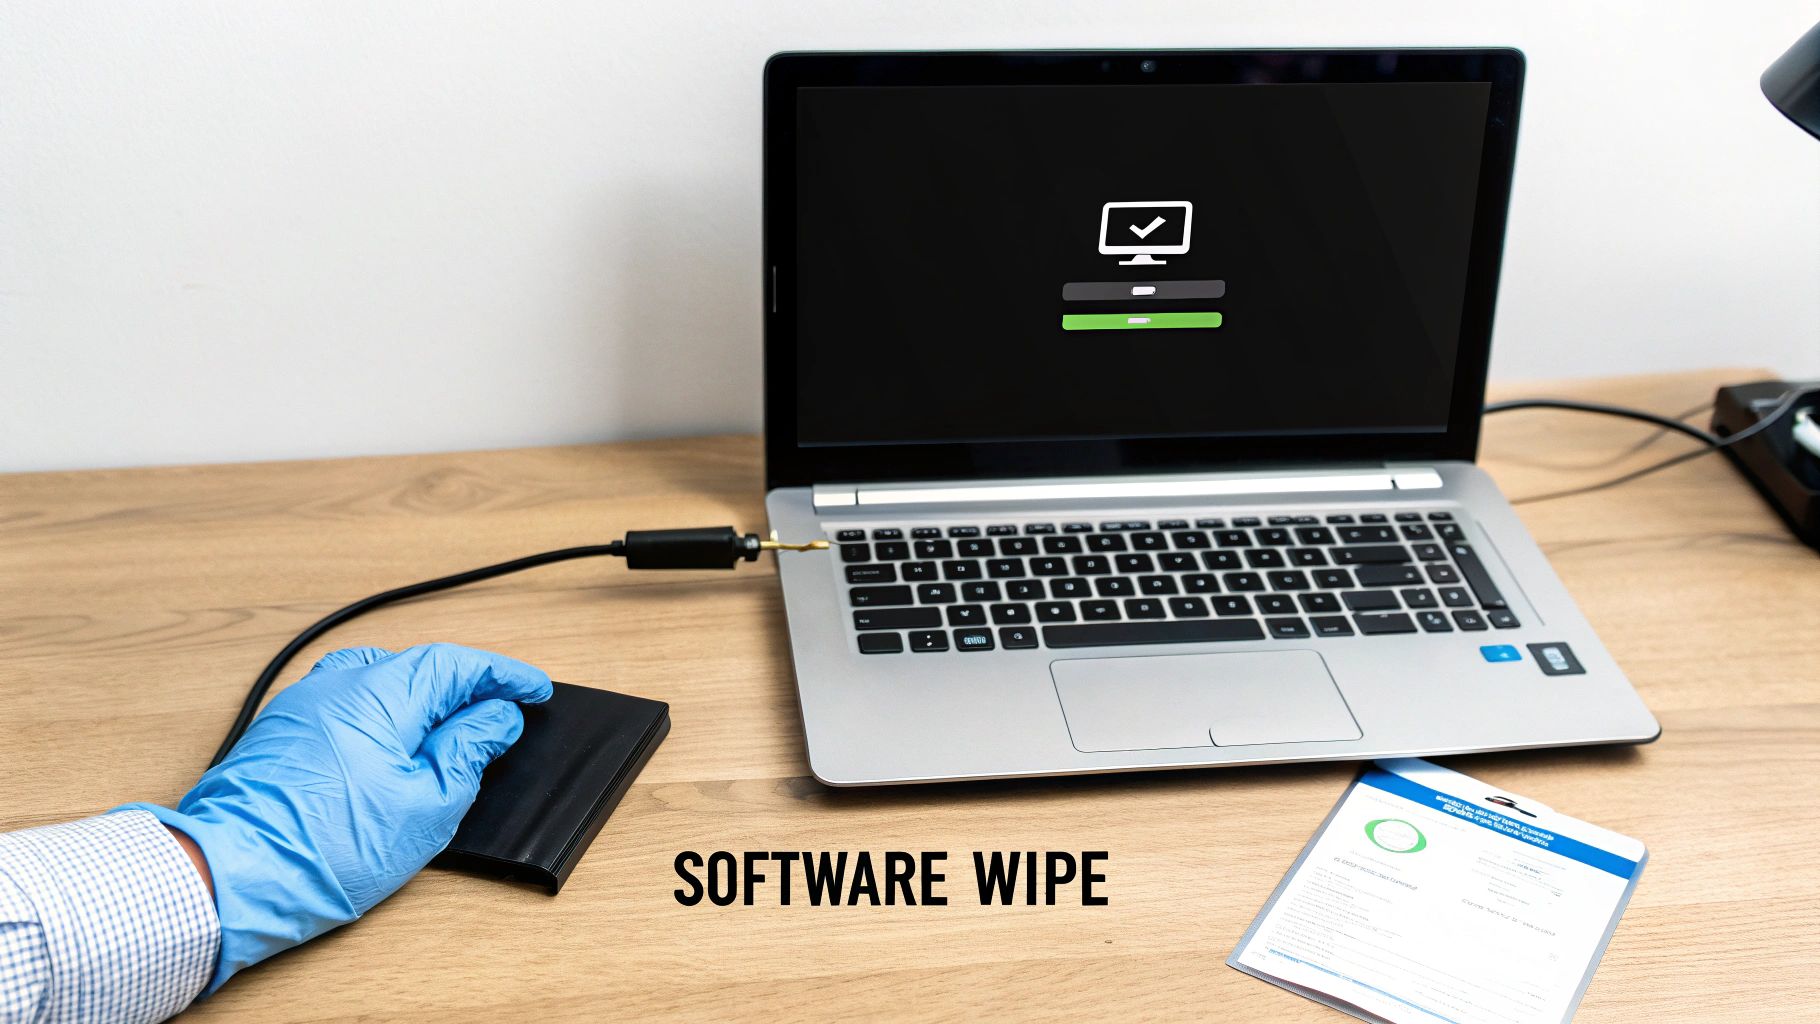
Software wiping uses specialized tools to overwrite every single sector of the drive with random, meaningless data, making the original information completely unrecoverable. This is often the best method for drives you plan to reuse or resell. For a look at professional options that guarantee compliance, you can learn more about secure data destruction services.
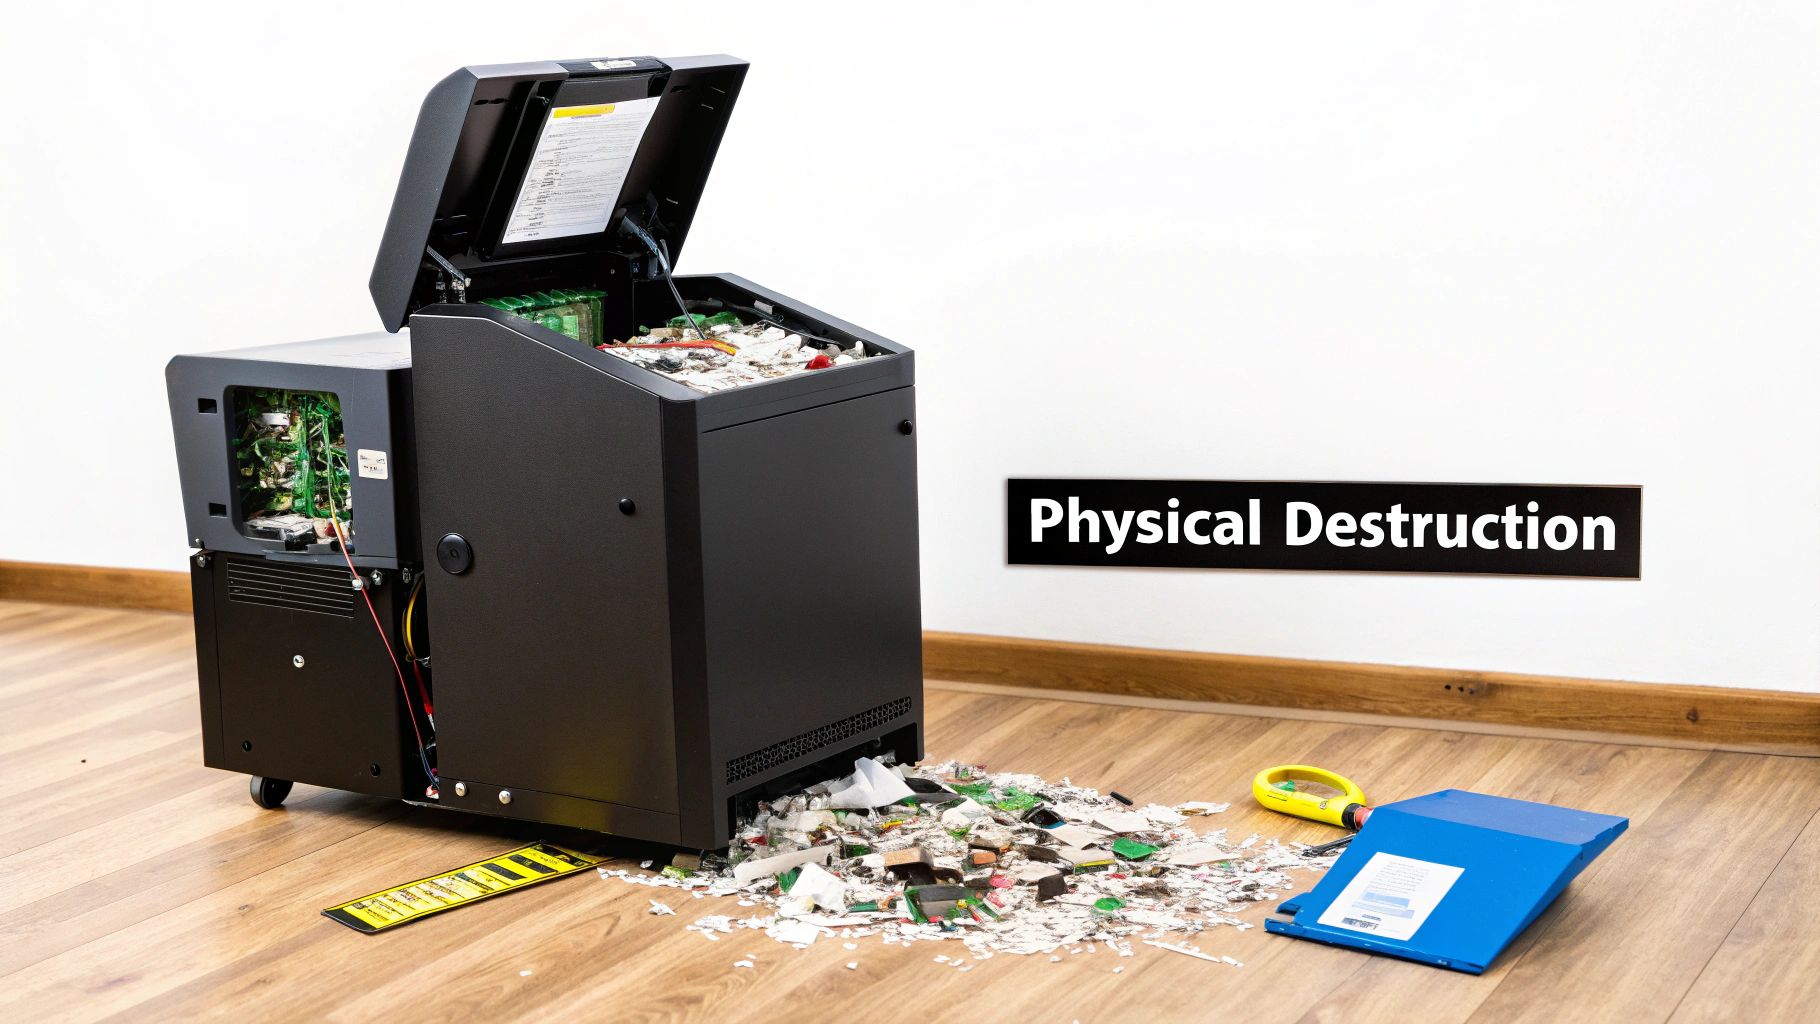
On the other hand, physical destruction is the only acceptable choice for drives that are broken, contain extremely sensitive data, or when specific regulations demand it. This guide will walk you through both approaches, ensuring you can confidently and compliantly dispose of your old media for good.
Choosing the Right Data Sanitization Method
So, you understand that just hitting "delete" on a file doesn't actually delete it. What's next? Picking the right way to completely sanitize a drive isn’t a one-size-fits-all deal. The best method really boils down to the type of drive you have, your specific security needs, and what you plan to do with the hardware when you're done.
Software-based wiping is where most people start. This just means using a program to overwrite every single part of the drive with new, meaningless data, effectively burying whatever was there before. The techniques can be as simple as a zero-fill, which writes a '0' over every sector, or they can be much more complex.
You've probably heard of the DoD 5220.22-M standard. For years, this was the benchmark for government and corporate data destruction across the United States. It overwrites the drive three separate times with different patterns to make sure the original data is completely unrecoverable.
Matching the Method to Your Drive Type
Here's where it gets tricky. The tried-and-true method for an old-school spinning Hard Disk Drive (HDD) is often the absolute worst thing you can do to a modern Solid-State Drive (SSD). Their internal designs are worlds apart, and using the wrong technique can do more than just fail to erase your data—it can cause unnecessary wear and tear on your expensive hardware.
- For Hard Disk Drives (HDDs): These are the classic drives with spinning magnetic platters. Overwriting works perfectly here. A multi-pass wipe, like the DoD standard, physically scrambles the magnetic state of each sector, making the original data truly impossible to get back.
- For Solid-State Drives (SSDs): SSDs use flash memory and have complex internal systems (wear-leveling) that spread writes out evenly across all memory cells. Because of this, some data can get moved to hidden, spare areas that normal wiping software can't even see. That leaves your sensitive information sitting there, completely untouched.
Running a standard DoD wipe on an SSD gives you a false sense of security. The drive’s own firmware may have cordoned off blocks of the original data, making it invisible to the software but still potentially recoverable down the line.
This decision tree shows the basic logic: simple deletion is never enough for true sanitization.
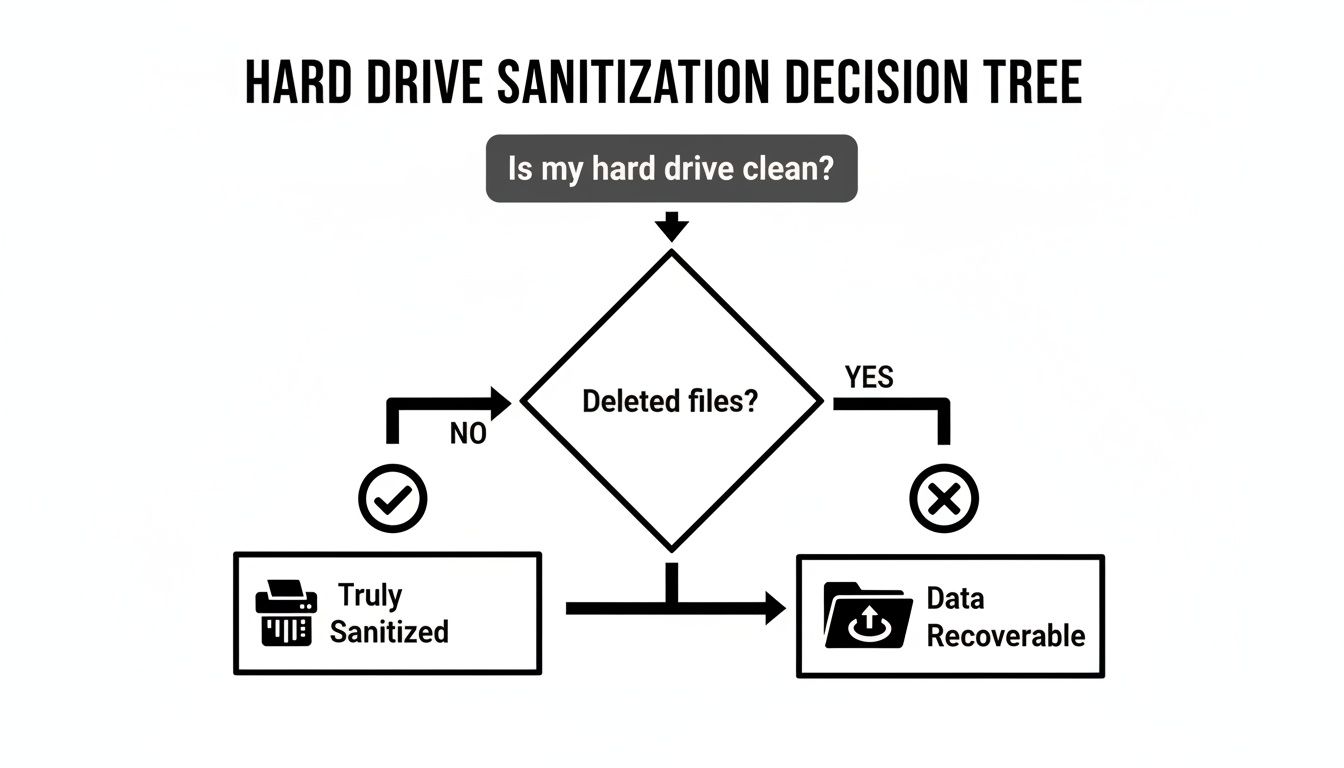
As you can see, only a dedicated sanitization process guarantees your data is gone for good.
Comparing Data Sanitization Methods
With so many options, it helps to see them side-by-side. This table breaks down the most common methods, how they work, and where they fit best.
| Method | How It Works | Best For | Compliance Suitability |
|---|---|---|---|
| Simple Overwrite (Zero-Fill) | Writes a single pass of zeros over the entire drive. | Low-risk data on HDDs being repurposed internally. | Low. Not sufficient for most regulatory standards. |
| DoD 5220.22-M (3-Pass) | Overwrites the drive three times with different character patterns. | HDDs containing sensitive but non-classified data. | Medium. Widely recognized but older; superseded by NIST. |
| ATA/NVMe Secure Erase | A built-in firmware command that tells the drive to wipe itself. | SSDs and modern HDDs. Highly effective and fast. | High. Aligns with NIST guidelines for Purge-level sanitization. |
| Crypto-Erase | Instantly deletes the onboard encryption key, rendering all data unreadable. | Self-Encrypting Drives (SEDs). | High. The fastest and most effective method for supported drives. |
| Physical Destruction | Shredding, pulverizing, or incinerating the drive. | Damaged drives or the highest security requirements. | Highest. The ultimate guarantee data is unrecoverable. |
Choosing the right tool for the job is critical. For a modern SSD, ATA Secure Erase is the clear winner, while for an old HDD, a multi-pass wipe is still a solid choice.
The Best Erasure Techniques for Modern Drives
Since old-school overwriting is a bad match for SSDs, we need a better approach. Luckily, today's drives come with powerful security features built right in.
The ATA Secure Erase command is part of the firmware on virtually all modern SATA drives (both HDDs and SSDs). When you trigger it, you're telling the drive's own controller to reset every single storage cell to its factory state. For an SSD, this is incredibly fast and efficient because it works with the drive's internal logic, not against it. It reliably hits all those hidden and over-provisioned areas that external software can't touch.
Another fantastic option is crypto-erase, available on self-encrypting drives (SEDs). Many of these drives encrypt your data by default from the moment you power them on, even if you never set a password. A crypto-erase simply involves deleting the drive's internal encryption key. Without that key, the terabytes of scrambled data on the drive become permanent digital garbage. The process takes seconds.
Following NIST 800-88 Guidelines
For a definitive, compliant framework, most organizations rely on the National Institute of Standards and Technology (NIST) Special Publication 800-88. These guidelines are the gold standard for media sanitization in the U.S. and worldwide.
NIST breaks sanitization down into three clear actions:
- Clear: This uses logical techniques (like a standard overwrite or ATA Secure Erase) to sanitize data in all user-accessible storage areas. It's good enough to protect against basic, software-based recovery tools.
- Purge: This goes a step further, using methods that make data recovery infeasible even with state-of-the-art laboratory techniques. Built-in secure erase commands and crypto-erase meet this much higher standard.
- Destroy: This is the final stop. It renders the media completely unusable through physical destruction—shredding, incineration, or pulverizing. This is your only option for failed drives or for the absolute highest security scenarios.
For any business or institution, especially those bound by HIPAA or other compliance rules, following these guidelines isn't just a good idea—it's essential due diligence. If you're managing a lab or data center decommission, understanding these options is the first step toward a secure and compliant process. For more on this, check out our guide on secure hard disk disposal.
A Practical Guide to Software-Based Wiping
Alright, let's move from theory to action and get our hands dirty with a secure drive wipe. This process isn't rocket science, but it absolutely demands your full attention. One wrong click could wipe out a drive you meant to keep, and trust me, that's a mistake you only make once. It's a costly and irreversible error.
This guide will walk you through the practical steps using trusted tools, ensuring your data is gone for good. We'll look at two common scenarios: wiping a classic spinning Hard Disk Drive (HDD) and sanitizing a modern Solid-State Drive (SSD). The approach for each is a bit different, but the prep work—creating a bootable tool—is the same.
Remember, the goal is to completely clean a hard drive so thoroughly that no ghost of the original data remains.
Prepping Your Toolkit: A Bootable USB Drive
Before you can wipe a drive, you need a way to start the computer from an external source, usually a USB stick. This lets the wiping software get full access to the target drive without the computer's operating system getting in the way.
For HDDs, one of the most trusted, field-tested tools is DBAN (Darik's Boot and Nuke). It's a free, standalone utility that boots from a USB and is built for one single purpose: bulk data destruction.
Making a bootable DBAN drive is pretty straightforward:
- Download the ISO file: Grab the DBAN ISO (which is a disk image) from its official source.
- Use a flashing tool: Software like Rufus or balenaEtcher will write that ISO file to a USB drive, making it bootable.
- Label it: Get a marker and label this USB drive clearly. You do not want this mixed up with your everyday thumb drives.
That's it. You've just turned a simple USB stick into a powerful data destruction tool. For a more detailed breakdown, check out our full guide on how to wipe a computer hard drive.
Executing the Wipe with DBAN for HDDs
With your bootable USB in hand, it's time to get to work. Plug the USB into the target computer and restart it. You'll need to interrupt the startup process to get into the BIOS or UEFI settings—this is usually done by tapping a key like F2, F12, or DEL right after you power on. Once inside, change the boot order so the computer boots from the USB drive first.
When the computer boots from the USB, you'll see the classic DBAN interface. It's a simple, text-based startup screen where you choose your wipe method. The interface is intentionally bare-bones to minimize the chance of errors, keeping the focus on selecting the right drive and erasure command.
From there, you pick the drive you want to wipe and the method. DBAN offers several options, but dodshort (a 3-pass wipe based on the DoD 5220.22-M standard) is a fantastic, robust choice for almost any situation. Once you kick it off, DBAN gets to work overwriting the data, a process that can take several hours depending on the drive's size.
Pro Tip: Before you start any wipe, physically disconnect every other drive from the machine. This one simple action prevents the most common and disastrous mistake in this business—wiping the wrong disk. There is no undo button.
Handling SSDs with Manufacturer Utilities
As we’ve mentioned, DBAN is the wrong tool for an SSD. Using it can actually reduce the drive's lifespan without guaranteeing a secure wipe. Instead, you need to use the drive manufacturer’s own software or a utility that triggers the drive's built-in ATA Secure Erase command.
Most major brands provide free tools for exactly this purpose:
- Samsung: Magician Software
- Crucial: Storage Executive
- Western Digital: Dashboard
These utilities are built to talk directly to the drive's firmware. They initiate the Secure Erase function, which resets all the memory cells—including those in over-provisioned areas the OS can't see—back to a factory state. Not only is this method far more effective for SSDs, but it's also dramatically faster than a multi-pass overwrite.
Verification: The Final and Most Critical Step
Once the software gives you the "all clear," your job isn't quite done. Verification is the last, non-negotiable step to confirm the job was done right.
Any professional-grade wiping utility will run a verification pass automatically after the wipe. It reads every single sector of the drive to make sure the original data has been completely replaced by the new overwrite pattern.
If that verification pass completes without a single error, you can be confident that the drive is truly sanitized. For anyone dealing with sensitive data under compliance rules like HIPAA, this confirmation is everything. It's the proof you need to reuse, sell, or donate that hardware without ever worrying about a data breach.
When Physical Destruction Is the Only Answer
While software-based wiping is a powerful and often ideal solution, it’s not a silver bullet. There are specific, critical scenarios where attempting to clean a hard drive with software is either impractical, insufficient, or completely impossible.
In these cases, physical destruction isn't just an option; it's the only responsible path forward to guarantee your data is gone forever. Deciding to physically destroy a drive is a final, irreversible step. You should consider this path when you encounter a dead drive that won't power on or outdated media, like old backup tapes, that can’t be reliably wiped with modern tools.
When Your Policy Demands Absolute Certainty
For many organizations, especially in government, defense, or healthcare sectors across the U.S., the choice is made for them by internal policy or regulatory mandate. When the data is so sensitive that even the theoretical possibility of recovery poses an unacceptable risk, physical destruction is the required protocol.
This ensures a 100% verifiable and auditable end-of-life process, leaving no room for error. This is where the difference between a software wipe and physical obliteration becomes crystal clear. Wiping sanitizes the data; destruction removes the possibility that data ever existed in a recoverable form.
Exploring Physical Destruction Methods
Once you've decided to destroy a drive, you have several methods to choose from. Each offers a different level of security and practicality, ranging from using powerful magnetic fields to brute-force shredding.
Common methods include:
- Degaussing: This process exposes the drive to an extremely powerful magnetic field, scrambling the magnetic domains on an HDD's platters and erasing the data. It's fast but completely ineffective on SSDs, which don't use magnetic storage.
- Shredding: Industrial shredders with cross-cutting blades chew the drive into small, irregular metal fragments, making reassembly impossible. This is one of the most common and secure methods for all drive types.
- Pulverizing: This takes shredding a step further by grinding the drive components into fine dust and particles, offering an even higher level of security.
- Incineration: Burning the drive at extremely high temperatures melts the components, destroying the physical substrate where data was stored.
For organizations seeking to completely clean a hard drive for compliance, shredding is often the most practical and certifiable method. It provides a clear, visible confirmation that the media has been rendered permanently inoperable.
The Role of Professional Destruction Services
While some may attempt DIY destruction methods, they are rarely sufficient for business or institutional needs. For guaranteed compliance and peace of mind, professional destruction services are essential. These services provide industrial-grade equipment and, most importantly, a certified process.
The scale of this need is immense. Organizations worldwide recently shredded a staggering two million hard disk drives in a single year. With hardware refresh cycles now as short as 3-4 years, the volume of retired media requiring secure disposal continues to grow. For hospitals transitioning to electronic medical records under HIPAA, this means countless legacy drives must be sanitized or destroyed. While certified software erasure can now clean a 10TB drive in under eight hours and boasts a 92% reuse rate, the finality of shredding remains a critical option.
When you engage a professional service, you receive a Certificate of Destruction. This legal document inventories every drive by serial number and attests to its secure destruction, providing the auditable proof required by regulations like HIPAA. For organizations that need to know more about this option, our guide to computer shredding services provides valuable details.
When considering the entire lifecycle of a hard drive, from data sanitization to its eventual physical handling, understanding proper care for electronic devices is crucial. For comprehensive guidance on protecting various electronic devices, you might find valuable information on how to store electronics. Ultimately, whether through software or shredding, the goal is the same: absolute data security.
Verifying Erasure and Documenting for Compliance
Successfully wiping a drive is a great technical step, but from a compliance and risk management perspective, the job is only half done. You can't just believe the data is gone—you have to be able to prove it.
This final stage of verification and documentation is what turns a simple IT task into a legally defensible action. It’s what protects your organization from liability and keeps you audit-ready at all times. Without it, your efforts are incomplete.
Verification Is a Non-Negotiable Step
After any software-based wipe, verification is your quality control. It's the process of reading every single sector on the drive to confirm that the original data was successfully overwritten. Think of it like a final inspection after a deep clean; you don't just assume the job is done, you check every corner.
Professional-grade wiping software almost always includes a built-in verification pass that runs automatically. If it finishes without errors, you have confirmation the wipe was 100% successful. Skipping this leaves a massive hole in your security protocol, as you'd never know if a software glitch or a failing drive sector prevented a complete erasure.
What Exactly Is a Certificate of Destruction?
When you move from wiping one or two drives to retiring a whole fleet of assets—or when you opt for physical destruction—the documentation needs to be much more formal. This is where a Certificate of Destruction (CoD) comes in.
This document is your official, auditable record proving that specific media has been permanently sanitized or destroyed. It’s much more than a receipt; it’s a formal legal statement that serves as your proof of compliance during an audit. For any institution governed by HIPAA, failing to produce this paperwork for disposed patient data can lead to staggering fines.
A Certificate of Destruction isn't just a "nice-to-have" piece of paper. It is a core component of your risk management strategy, proving you took deliberate, certified steps to protect sensitive information.
Key Elements of a Compliant Certificate
For a Certificate of Destruction to hold up in an audit, it can't be a generic form. It needs to contain specific, detailed information that creates an unbroken chain of evidence.
A compliant certificate must always include:
- Unique Serial Numbers: A full inventory of every single hard drive or piece of media that was processed.
- Method of Sanitization: A clear description of how the data was destroyed (e.g., DoD 5220.22-M 3-pass wipe, physical shredding).
- Date and Location: The specific date and location where the destruction happened.
- Chain of Custody: Records or signatures showing who handled the assets from pickup to final disposition.
- Statement of Confidentiality: An affirmation that the entire process was handled securely from start to finish.
Getting this crucial document right can be a complex process. You can learn more about what makes a strong Certificate of Destruction and why it’s so critical for your organization’s security.
Working with a professional service like Scientific Equipment Disposal streamlines this entire workflow. We handle the logistics, perform the certified data destruction, and automatically provide the detailed Certificate of Destruction you need. This takes the administrative weight off your team and gives you the concrete proof required to face any audit with confidence.
Of course. Here is the rewritten section, crafted to sound like a human expert, following the specific style and formatting of your examples.
Common Questions About Cleaning Hard Drives
Even with a solid plan, you're bound to run into questions when it's time to wipe a hard drive for good. The stakes are high, and doing it right is everything when it comes to security and compliance. We get calls all the time from clients here in Atlanta and across the country with these exact same concerns.
Let's walk through some of the most common questions we hear. Getting these details right is the difference between a secure, compliant disposal and a data breach waiting to happen.
Does Drilling Holes in a Hard Drive Actually Work?
It seems like common sense, right? Punch a few holes through a hard drive, and the data is gone. While drilling a hole is certainly better than just tossing a drive in the bin, it’s not a foolproof method by any stretch.
For a traditional spinning hard drive (HDD), this can shatter the magnetic platters and make data recovery a real nightmare for anyone trying to piece it back together. The problem is, a determined forensic expert might still be able to recover data fragments from the undamaged sections. It creates a false sense of security. For genuine peace of mind and to meet standards like HIPAA, you need auditable, guaranteed solutions like multi-pass software wiping or professional shredding.
What Is the Main Difference Between Wiping an HDD and an SSD?
This is a critical question, and the answer comes down to the fundamental technology inside the drive. How you sanitize the drive depends entirely on what kind you have.
- HDDs (Hard Disk Drives) are mechanical. They store data on spinning magnetic platters. When you overwrite the data multiple times with patterns of zeros and ones, you reliably scramble that magnetic state, making the original information unrecoverable.
- SSDs (Solid-State Drives) are a different beast. They use flash memory and have complex internal systems to manage wear and tear. These drives often move data to hidden, "over-provisioned" areas that standard wiping software can't even see, let alone access. This means sensitive information could be left behind without you ever knowing.
That’s why for an SSD, you should always use the drive's built-in ATA Secure Erase command or perform a crypto-erase. These methods work directly with the drive’s own firmware to ensure every single memory cell gets properly reset.
Can I Reuse a Drive After a Secure Wipe?
Absolutely. This is one of the biggest benefits of software wiping over turning a drive into a pile of metal shavings. Once a drive has been properly sanitized using a certified method like the DoD 5220.22-M 3-pass standard or NIST 800-88 guidelines, all previous data is gone for good.
The drive is completely safe to be redeployed within your organization, donated to a local school, or sold on the secondary market. It's a smart move that saves money on hardware refreshes and is also an environmentally responsible choice that keeps valuable equipment out of a landfill.
Choosing to reuse sanitized drives supports sustainability goals by reducing e-waste, a growing concern for businesses and institutions across the country.
When Should I Use a Professional Data Destruction Service?
If you're just wiping your old personal computer, a DIY software tool can get the job done. But for businesses, hospitals, and universities, the situation is entirely different. When you’re dealing with multiple devices and have regulatory requirements like HIPAA to worry about, bringing in a professional service is the only prudent choice.
Professionals bring several key advantages to the table:
- Efficiency: They have the tools and processes to securely handle hundreds of drives in the time it would take your internal team to do just a few.
- Guaranteed Compliance: You get an official Certificate of Destruction for every single drive, creating a bulletproof audit trail.
- Reduced Risk: The liability for secure data disposal shifts to them, protecting your organization from massive fines and legal headaches.
For any organization in the Atlanta metro area or beyond, using a professional service isn't just a convenience—it's an essential part of proving due diligence.
When your organization needs absolute certainty that its data is securely and compliantly destroyed, Scientific Equipment Disposal provides the expertise and documentation you need. We offer on-site services throughout the Atlanta area for hospitals, labs, and businesses, ensuring your retired assets are handled correctly. Find out how we can help you manage your e-waste securely at https://www.scientificequipmentdisposal.com.