Your Equipment Lab Decommissioning & Disposal Guide

A lab shutdown rarely starts with the equipment. It starts with an email from leadership, a lease deadline, a renovation notice, a grant transition, or a request to clear one room so another group can move in. Then the important questions hit. What still contains hazardous residue? Which instruments store patient data or research files? What can be moved, what must be decontaminated first, and what needs documented disposal?
That is where most equipment lab projects go off track. Facility teams know how to run buildings. Lab managers know how to run instruments. But end-of-life handling sits in the middle of EHS, facilities, IT, procurement, security, and transport. If no one owns the full chain of custody, small mistakes become expensive ones.
Navigating the Complex World of Lab Equipment Disposal
A typical call comes from a facility manager who thought the job would be simple. A few freezers, an analyzer, some benches, a biosafety cabinet, a stack of obsolete PCs, and a room full of boxed glassware. Then they discover the freezer still contains samples, the analyzer has an internal drive, the hood cannot be pulled until utilities are isolated, and the loading dock schedule conflicts with patient traffic or classroom access.
That is why equipment lab disposal is not a junk haul. It is a controlled decommissioning job. The work has to account for contamination status, asset identification, internal approvals, secure removal, transport records, downstream recycling, and final documentation. In hospitals and clinics, the data issue alone changes the entire risk profile. In universities, the challenge is often shared equipment, unclear ownership, and fragmented records. In government and industrial sites, chain-of-custody discipline matters from the first tag to the final certificate.
Existing guidance on equipment lab topics largely focuses on buying, using, or managing active equipment, while end-of-life disposal is often left unaddressed. That gap is especially noticeable for Atlanta-area hospitals, universities, and labs managing shutdowns or space turnover, leaving many teams unsure how to handle data security or achieve high landfill diversion rates with expert partners, as noted by the University of Michigan facilities resource reference used in the content brief.
What makes these projects harder than they look
Some problems are obvious. A centrifuge is heavy. A fume hood is fixed to the building. A freezer may contain refrigerants and residue.
Others are less visible:
- Embedded data: Sequencers, analyzers, imaging systems, and attached workstations may store PHI, test histories, user credentials, or proprietary methods.
- Mixed waste streams: One room can contain electronics, metals, plastics, treated wood, chemicals, and regulated components.
- Documentation gaps: Many organizations know what they bought, but not what was modified, moved, leased, or retired informally.
The safest projects start by assuming nothing is clean, nothing is data-free, and nothing should move without a documented disposition path.
In practice, the work succeeds when one team controls the sequence from on-site review through final disposal. That is the difference between a clean closeout and a scramble.
The Decommissioning Blueprint Planning and Inventory
Planning decides whether the rest of the job runs smoothly or stalls halfway through. Before a single instrument is moved, every asset in the equipment lab should be identified, matched to a location, and assigned a disposition path. That sounds administrative. It is not. It drives labor, permits, decontamination, truck space, timing, and risk.
The scale of this work is only increasing. The global laboratory equipment market was valued at USD 30.9 billion in 2023 and is projected to reach USD 60.25 billion by 2032, a 7.7% CAGR over the 2024 to 2032 forecast period, according to the laboratory equipment market projection from SNS Insider. More equipment in service means more equipment reaching end-of-life, relocation, surplus, or replacement status.
Start with a real inventory, not a room count
A room list is not enough. “Chem lab 214” does not tell your mover, your EHS lead, or your recycler what exists in that room.
Build an inventory line by line. Include:
- Asset identity: Manufacturer, model, serial number, internal asset tag, and current room.
- Physical profile: Benchtop, floor-standing, built-in, utility-connected, fragile optics, rolling base, or fixed casework attachment.
- Condition: Reusable, obsolete, damaged, incomplete, cannibalized, or unknown.
- Risk category: Bio residue, chemical residue, radiological concern, refrigerant, compressed gas interface, mercury component, or no known contamination.
- Data status: No media, attached PC, internal storage, controller, printer memory, or uncertain.
If you do nothing else in the first week, tag the equipment. Every later decision depends on being able to match the physical object to a record.
Separate ownership from handling
Many decommissions slow down because the person requesting removal does not own the asset. Procurement may still show it on contract. IT may own the workstation. Research administration may need grant disposition approval. Facilities may control utility shutdown. EHS may require clearance before loading.
A usable matrix looks like this:
| Decision area | Typical owner | Why it matters |
|---|---|---|
| Asset release | Department or procurement | Prevents accidental removal of leased or shared items |
| Decontamination signoff | EHS or lab supervisor | Confirms equipment is safe to handle |
| Data disposition | IT, privacy, or security | Determines wipe vs. shred path |
| Utility disconnect | Facilities or vendor tech | Avoids damage to building systems |
| Pickup window | Facilities and operations | Keeps loading docks and corridors usable |
Scope the project by removal path
Do not treat all equipment the same. In the field, I separate equipment lab inventories into four practical lanes:
- Straight recycle for obsolete electronics and broken lab hardware with no reuse path.
- Decontaminate then remove for equipment exposed to biological or chemical work.
- Data-bearing assets that require sanitization or physical destruction of media.
- Building-tied systems such as hoods, specialty casework, or utility-connected units that need de-installation planning.
That split clarifies timeline and staffing faster than broad categories like “lab equipment” or “surplus.”
Build the schedule backward from constraints
Many teams start with the desired move-out date. Better results come from working backward from hard constraints:
- certificate or clearance requirements
- utility isolation windows
- occupied-building access restrictions
- loading dock times
- freezer defrost and product removal
- records retention approval
- truck access and staging space
If one large analyzer needs vendor disconnect instructions and one BSC needs clearance paperwork, those become schedule anchors.
Early coordination prevents the most common delays. The project does not slow down because a truck is late. It slows down because a room was never made ready for pickup.
For organizations comparing service models, a directory of certified scientific equipment disposal providers can help frame what capabilities to ask about, especially around logistics, documentation, and downstream handling.
Safety First Decontamination and Asset Segregation
Once the inventory is built, the next job is to make the equipment safe. This is the line many teams underestimate. They assume unplugged means safe. It does not. A disconnected incubator can still contain residue. A centrifuge can still hold contamination in the rotor chamber. A biosafety cabinet can look clean and still fail clearance.

The first separation that matters
Before cleaning begins, segregate assets into handling groups. That prevents cross-contact and keeps transport decisions clean.
A practical field split is:
- Known clean equipment: Office-connected PCs, monitors, carts, and general electronics from non-lab zones.
- Lab-exposed but decontaminable equipment: Centrifuges, incubators, refrigerators, freezers, analyzers, and small benchtop tools.
- Special handling units: Biosafety cabinets, fume hoods, HVAC-linked units, mercury-associated systems, and anything with uncertain residue.
- Consumables and loose materials: Glassware, tubing, pipette tip boxes, sharps containers, and packaging.
The mistake to avoid is mixing “probably clean” with “verified clean.” Those are not the same thing.
Use agent-specific cleaning protocols
For biological contaminants, proper decontamination requires a 1:10 bleach-to-water solution followed by a 70% alcohol wipe, and audited professional programs using these standards report a 98% first-pass clearance rate in lab decommissioning work, according to SEPS decommissioning guidance.
That matters because generic wiping is not a protocol. The cleaning agent has to match the exposure risk.
A practical approach looks like this:
| Exposure type | Typical action |
|---|---|
| Biological residue | Apply 1:10 bleach-to-water solution, then follow with 70% alcohol wipe |
| Corrosive chemical residue | Neutralize according to the chemical profile and internal SOPs |
| Refrigerated units | Empty contents, remove trays, manage condensate and refrigerants correctly |
| Mercury-associated components | Follow vendor or approved SOP handling before release |
| Radiological concern | Require swipe testing and clearance through the appropriate radiation safety process |
For teams that need a plain-language refresher on sterile handling basics outside a full decommissioning project, this guide on how to sterilize medical equipment is useful background reading. It does not replace your site procedures, but it helps non-lab stakeholders understand why cleaning standards cannot be improvised.
Documentation is part of decontamination
In a compliant decommission, the work is not finished when the surface looks clean. It is finished when the equipment is cleared, tagged, and documented for release.
That usually includes:
- Decommissioning or hazard tags attached after verification
- Certificate of Decontamination or equivalent internal release document
- Notes on residual exclusions if some components were removed separately
- Transport classification for packaging and shipment planning
Without that paperwork, downstream handlers should treat the item as unverified.
If a facility cannot show decontamination records, the safest assumption is that the equipment still requires controlled handling.
The sterilization of equipments guidance from S.E.D. is one example of the type of operational checklist teams use to align lab staff, EHS, and pickup crews before removal is scheduled.
What usually goes wrong
The failure points are predictable.
One is partial cleaning. Staff wipe external panels but miss reservoirs, drip trays, rotor cavities, filters, or drain lines. Another is premature packing. Equipment gets wrapped before anyone verifies clearance, which creates rework and contamination concerns on the loading dock.
The safest pattern is simple. Clean. Verify. Tag. Then move.
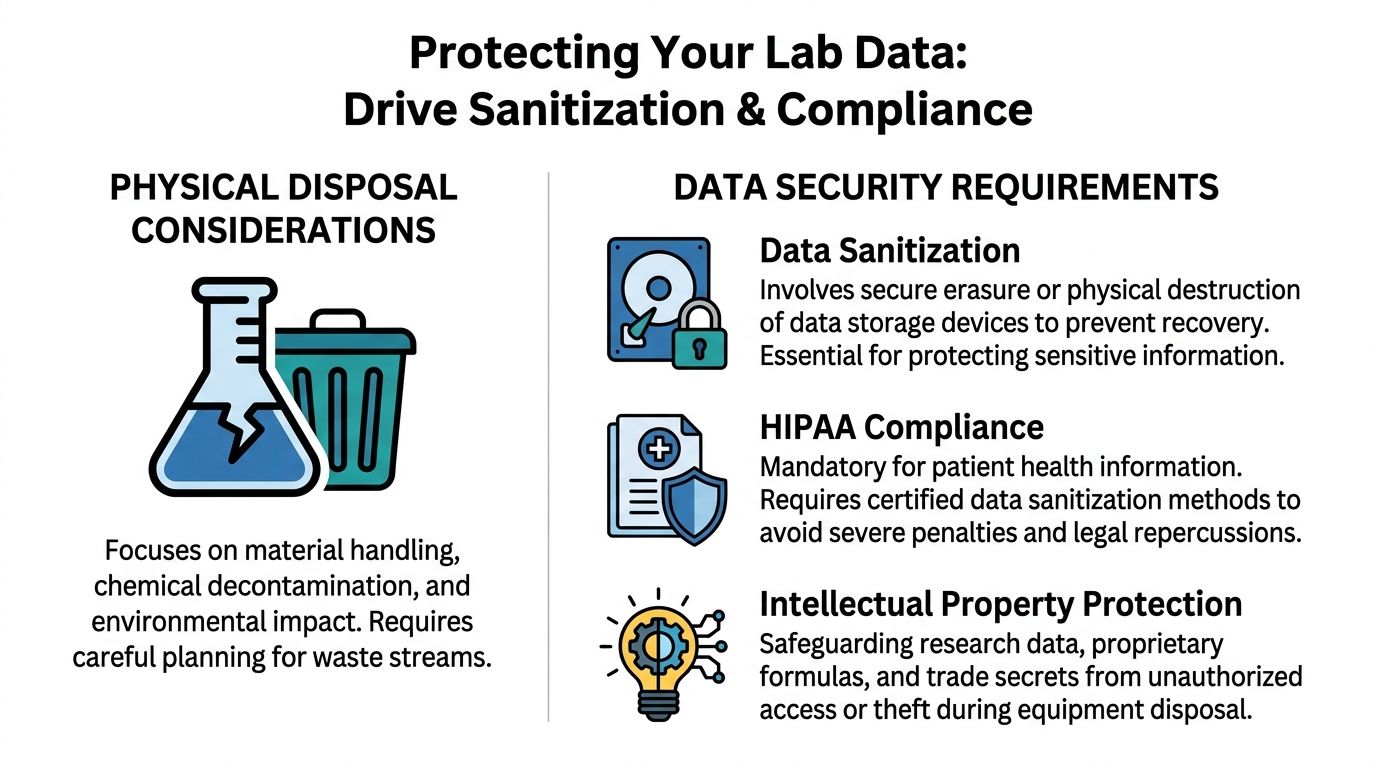
Protecting Your Data Drive Sanitization and HIPAA Compliance
Physical decontamination gets the most attention because it is visible. Data risk is quieter and often more serious. Modern equipment lab assets do not just process samples. Many of them store information. Some have hard drives. Others have embedded controllers, attached workstations, removable media, local user accounts, test logs, patient identifiers, instrument methods, or network settings.
Deleting files is not enough. Pulling a machine from service without addressing storage media is not enough either. If the equipment ever touched patient information, internal research data, or proprietary workflows, the disposal plan has to include verified sanitization.
Wiping and shredding are not interchangeable
The first decision is whether the media is functional.
If the drive is functional and approved for sanitization, a structured overwrite process can support a secure release path. If the drive is failed, obsolete, inaccessible, or not worth preserving, physical destruction is usually the cleaner answer.
A rigorous decommissioning methodology that includes DoD 5220.22-M data wiping for electronics has been shown to reduce regulatory violations by 80% compared to ad-hoc in-house efforts, according to the UCI lab decommissioning reference. That is the benchmark that matters. Not convenience. Not assumptions. Auditable process.
Here is the practical difference:
| Method | Best fit | Main purpose |
|—|—|
| Drive wiping | Functional media approved for overwrite | Secure erasure with recordable process |
| Physical shredding | Failed, obsolete, or high-risk media | Irreversible destruction |
| Device-only disposal without media review | Not acceptable for sensitive environments | Leaves recovery risk unresolved |
HIPAA risk hides in unexpected equipment
Facility teams often think of servers and desktop PCs first. They should. But healthcare and research environments store data in less obvious places too.
Common examples include:
- analyzers with internal storage
- imaging workstations
- sequencer control PCs
- printer/scanner memory
- instrument-attached laptops
- legacy towers tucked under benches
- external drives in drawers or carts
The legal issue is straightforward. If a device contains PHI and leaves your control without proper sanitization, the problem is not the age of the machine. The problem is the release of recoverable data.
Chain of custody has to include the digital side
A secure process documents who identified the media, who removed or sanitized it, how it was tracked, and what final action was taken. If any step is informal, the audit trail weakens.
The strongest programs require:
- Asset-to-media matching so the drive or device is tied to the equipment record
- Documented handling status such as wipe pending, wiped, shred pending, or shredded
- Controlled transfer records during pickup and processing
- Final certificate or destruction record retained with the project file
“We removed the old lab system” is not a defensible data disposition record. Auditors and privacy officers look for method, date, asset identity, and proof of completion.
For organizations that need a service path for this piece of the chain, secure data destruction is the category to ask about. The useful questions are specific. Do you wipe functional drives, shred failed media, document the method, and preserve chain of custody from pickup through final disposition?
Those answers matter more than any generic promise of “secure recycling.”
Logistics in Motion On-Site De-installation and Secure Transport
A decommission gets real when the first tool cart rolls into the corridor. Planning, clearance, and data handling all feed into this moment. If de-installation is sloppy, the project starts generating damage claims, blocked hallways, broken optics, utility problems, and missing paperwork.

The move starts inside the room
Lab equipment has changed from simple glassware and mechanical tools to complex automated systems, which means disposal crews now handle everything from fragile microscope optics to heavy centrifuge assemblies, each with different de-installation and transport needs, as described in this overview of the evolution of lab equipment from test tubes to smart machines.
That range changes how crews work on site.
A benchtop balance may need antistatic packing and shock protection. A floor centrifuge may need rotor removal, door securing, and center-of-gravity management. A fume hood may need coordinated disconnection, sectional breakdown, and route protection through occupied space. The equipment lab label does not tell you any of that. The field survey does.
What controlled de-installation looks like
On a well-run job, the sequence is deliberate.
First, the crew confirms asset identity against the removal list. Then they verify decontamination tags and data status. After that, they isolate power, plumbing, exhaust, or network connections as needed. Sensitive pieces are packed before they leave the room, not after they reach the truck.
A simple checklist often works better than a long narrative:
- Verify release status: Match serial number, room, and approval.
- Protect the facility: Floor covering, wall guards, elevator pads, dock coordination.
- Stabilize the asset: Remove loose accessories, secure doors, trays, arms, and detachable parts.
- Pack by risk: Crates, padded wrap, anti-tip handling, or upright transport requirements.
- Record transfer: Each item is logged as it moves from room to truck.
That last point is where chain of custody becomes physical instead of theoretical.
Secure transport is part of compliance
Too many guides stop at “pickup.” Pickup is not the finish line. Once an item leaves the building, you still need accountability.
That means knowing:
| Stage | What should be documented |
|---|---|
| Room release | Asset ID, condition, decontam status |
| Loading | Item count, packaging condition, transfer confirmation |
| Transit | Vehicle assignment and custody responsibility |
| Receipt at processing site | Arrival confirmation and intake status |
For mixed corporate and lab cleanouts, a general office relocation checklist can help facilities teams coordinate building access, labels, and stakeholder communication. It is not lab-specific, but it is useful for the operational side of multi-room moves where offices and labs are being cleared together.
For the lab-specific side, organizations often need a vendor that can handle on-site removal as a controlled project rather than as a generic freight pickup. Research facility equipment removal services are one example of that model. Scientific Equipment Disposal operates its own box-truck fleet for on-site de-installation, packing, pickup, and logistics, which is relevant when a facility wants one chain of custody from room to final processing rather than handing the job across multiple transport parties.
The handoff point is where mistakes multiply. Fewer custody breaks usually mean fewer documentation gaps.
Final Disposition Certified Recycling and Sustainable Outcomes
Once the equipment leaves your site, the job is still not finished. Final disposition decides whether the project closes cleanly in your records or stays open as an audit question. Facility managers need to know where materials went, how they were processed, and what proof exists.
What certified recycling means in practice
Certified recycling is not a vague promise that equipment was “handled responsibly.” It means materials are processed through documented downstream channels that sort equipment into commodity streams such as metals, plastics, glass, boards, wiring, and other recoverable components. It also means hazardous elements are not treated like ordinary scrap.
That distinction matters for equipment lab projects because lab assets are rarely single-material items. One analyzer may include stainless steel, circuit boards, plastic housings, cables, display panels, and storage media. A freezer adds another set of handling concerns. A biosafety cabinet introduces still more.
Documentation closes the loop
The final paperwork should match the removal scope and provide a usable record for EHS, facilities, IT, procurement, and sustainability reporting.
Typical closeout documents include:
- Certificate of disposal or recycling
- Asset list matched to final disposition
- Data destruction records where applicable
- Notes on any excluded items or separate hazardous waste streams
Without that closeout package, teams often end up with partial records spread across departments. That creates work later when auditors, compliance staff, or leadership ask for proof.
Sustainability is a byproduct of disciplined process
The environmental result improves when the project is organized correctly at the start. Good inventory work reduces mystery items. Proper segregation keeps recyclable material out of contaminated loads. Verified decontamination broadens safe handling options. Data-bearing equipment can move through secure channels without being stranded in storage because no one is comfortable releasing it.
For readers comparing practical examples of these end-of-life pathways, equipment in lab is the kind of reference that helps connect asset type to removal and recycling method.
The main point is simple. A sustainable outcome does not begin at the recycling dock. It starts in the lab, with identification, segregation, sanitization, and documented transfer.
Your Equipment Lab Disposal Questions Answered
How long should I expect a lab cleanout to take
It depends on access, contamination status, utility dependencies, and how complete your inventory is. A single-room pickup with already-cleared bench equipment can move quickly. A hospital wing, university department, or multi-room shutdown takes longer because approvals, loading access, and data handling all stack together.
The best way to shorten lead time is to make the site ready before the crew arrives. Confirm what is released, what still needs decontamination, what contains data, and what cannot move until facilities isolates utilities.
What usually drives cost
Cost often follows labor complexity more than simple item count. The biggest cost drivers are usually:
- Special handling: Built-in hoods, large analyzers, floor safes, and awkward access routes
- Decontamination requirements: Equipment that cannot be released until verified clean
- Data-bearing devices: Media review, wiping, shredding, and recordkeeping
- Scheduling constraints: After-hours work, dock restrictions, or phased removals
- Packaging needs: Fragile optics, upright transport, or custom protection
A room full of small clean electronics can be straightforward. One large instrument with unclear contamination and no removal path can consume more effort than the rest of the room combined.
What if some equipment is leased or still in service contract
Do not move it until ownership is verified. Leased assets, reagent-rental equipment, and vendor-maintained instruments often require return authorization or a vendor-specific disconnect process. The inventory stage should flag those items early so procurement or the department can resolve them before pickup day.
If you are unsure, separate those assets physically and in the spreadsheet. Ambiguity on paper becomes conflict on the dock.
How should we handle equipment with resale value
Start with condition, completeness, and release status. If the unit is clean, functional, and not blocked by data or contract issues, you may have options beyond straight recycling. But do not let the possibility of resale stall the entire decommission. In many closures, storage costs and delay risk erase the value of waiting for a hypothetical buyer.
A practical approach is to assign a short decision window. If no reuse path is confirmed by that date, move the asset into the approved disposition channel.
The wrong move is parking uncertain equipment in a hallway or warehouse “for later.” That is how chain-of-custody records disappear.
What about glassware, plastics, and general lab supplies
Treat them separately from instruments. Loose consumables, broken glass, chemical containers, and clean reusable labware do not belong in the same handling stream as electronics and powered equipment. Some items can move as ordinary cleanout material if they are verified empty and non-hazardous. Others need EHS review.
The safest practice is to sort these items before the equipment crew arrives. Mixed rooms slow everyone down.
Can staff perform some of the work internally
Yes, but only if responsibilities are clear. Internal teams are often well suited for inventory collection, departmental approvals, data owner identification, and removal of retained samples or records. The higher-risk tasks are decontamination verification, data destruction decisions, heavy de-installation, and final chain-of-custody handling.
Internal participation works best when the site defines where staff stop and the disposal team takes over.
What should be ready before pickup day
A short pre-pickup checklist helps:
- Final inventory approved
- Decontamination records attached where required
- Data-bearing devices identified
- Leased or excluded assets marked
- Utility disconnects scheduled
- Access route cleared
- Dock and elevator windows confirmed
If those seven items are in place, the project usually runs with far fewer surprises.
Do small clinics and school labs need the same rigor as large research sites
The same principles apply. The scale changes, not the need for control. A small clinic may have fewer assets, but if one retired analyzer stores patient data, the privacy risk is still real. A school lab may not have PHI, but it still needs safe segregation, documented removal, and responsible recycling.
What is the most common mistake facility managers make
They start with hauling instead of classification. Once a mixed room is already packed or moved into a staging area, it becomes much harder to prove what was clean, what held data, what belonged to whom, and what final path each item should take.
Start with identification. Everything else gets easier.
If you are planning an equipment lab cleanout, shutdown, relocation, or surplus pickup, Scientific Equipment Disposal can help you coordinate the practical details that usually cause delays: inventory alignment, de-installation logistics, secure data handling, and documented final disposition for labs, hospitals, schools, corporate facilities, and government sites in Atlanta and beyond.